How to Turn Off the Paragraph Symbol in Word
I remember, first, seeing these little backward P thingies when I was at school. In IT lessons, we learned the ins and outs of using Microsoft Office. And the teacher would have us check that any documents we created were laid out nice and neatly with no mistakes. We, of course, did this using formatting marks, including the backward P, i.e. the paragraph symbol (¶).
Some people still find paragraph symbols useful today. They’re great for checking your work when you need to share or submit any kind of formal document, for example. Others think formatting marks just get in the way.
Either way, it’s good to know how to switch them on or off. So, in this post, we’re going to show you how to turn off the paragraph symbol in just two simple steps. Plus, you can read on to find a bunch of handy information about paragraph symbols along with further formatting tips.
How to Turn Off the Paragraph Symbol in Word
Windows
Step 1. Head to File > Options > Display.
Step 2. Under Always show these formatting marks on the screen, uncheck the box next to Paragraph marks.
Mac
Step 1. Head to Word > Preferences > View.
Step 2. Under Show Non-Printing Characters, uncheck Paragraph marks.
To turn paragraph symbols on again, simply follow the same steps but check the box instead.
What is the Paragraph Symbol in Word?
Also known as a pilcrow or paragraph mark, the paragraph symbol (¶) is a type of formatting mark in Microsoft Word. When you have paragraph marks switched on, a paragraph symbol appears at the end of each paragraph when you hit return. They won’t appear on your document when you print it.
The paragraph symbol also contains formatting information for its respective paragraph. Thus, if you want to copy the formatting of one paragraph (the font, size, etc.), you just need to copy and paste the symbol onto another paragraph. The symbol at the end of the doc contains formatting information for the entire doc, e.g. margins or headers.
Why Use the Paragraph Symbol?
Paragraph symbols are useful for checking the layout of your Word document. For example, you might switch on paragraph marks and discover that you’ve hit the return button twice, leaving too much space between two paragraphs. If you want your doc to look professional then this is, of course, something that you’d need to fix.
Paragraph symbols also help the person who edits the document, whether that’s you, a colleague or a professor, for instance. When you start to delete text, tables, images and the like, it helps to know that the paragraph formatting is still correct. In other words, you’re not leaving any random gaps in the document. Similarly, if you insert text or objects it’ll help you maintain the formatting, i.e. distinguishable paragraphs.
Furthermore, paragraph marks are useful when you copy and paste text from another channel, e.g. a Zoom transcript, or document format, e.g. a PDF. They’ll help you discover what kind of formatting is already in place and help you create a clean, organized document.
When might they not be useful? Some users find paragraph symbols and other formatting marks too distracting when trying to create a document.
What are the Other Formatting Marks in Word?
There are a number of further formatting marks you can use in Microsoft Word. Go to File>Options>Display and you can switch individual formatting marks on or off, or choose to show all formatting marks.
Here are some of the more common formatting marks and what they’re used for:
1. Tab Characters
The tab character is a small right-facing arrow (→). Use these characters to see where the text has been indented. It’s less common now, but traditionally you would always indent the beginning of a new paragraph.
You may use a lot of indents if you’re writing a book – to signal a new chapter, section or dialogue. Or perhaps you use indents to cite somebody else’s text in an article or essay. These are a few instances where it would be useful to toggle the tab character on and check if you’ve formatted your writing correctly.
2. Spaces
The space character appears as a small dot between words(·). You can use them to check your doc for double or multiple spaces. It’s unlikely that you’ll ever need multiple spaces. You can use other formatting features to create a cleaner effect, e.g. tabs.
Using the space character may be useful as a double space is harder to spot than an extra paragraph line.
3. Object Anchors
An object anchor looks like a little ship anchor (⚓). They indicate the position of a floating image in relation to a paragraph.
Inline images appear on their own line between paragraphs. While floating images have text flowing around them. You might use a floating image if you only need a small image and want to avoid having blank space. For example, you may have a small headshot with text flowing around it at the top of your resume.
So, you can use the object anchor to make sure your floating images are inserted in the right spots.
Microsoft Word Formatting Tips
You’ve no doubt got the basics down. So, here are some more advanced formatting tips and tricks that will save you time and energy:
1. Utilize Templates
Forego the headache of formatting your document from scratch. Just use a template instead. The great thing is, Word has templates to suit a variety of purposes.

For instance, there are templates that will help you create a professional-looking resume and cover letter. There are even templates already formatted in the MLA and APA styles for papers. How handy is that?
You can also create your own templates in Word. This means you won’t need to format every document individually which could save you a lot of time. Furthermore, it will ensure that all of your docs are formatted consistently.
2. Capitalize Words Easily
It’s so annoying when you type something out and then have to capitalize it manually. For example, if you decide to turn a sentence into a header.
Thankfully, there’s a much easier way to capitalize the entire sentence in one go:
Step 1. Highlight the text you want to capitalize.
Step 2. Click the Aa button.
Step 3. Select Capitalize Each Word.
In fact, this button has several useful actions. You can change text to sentence case, uppercase or lowercase. Again, this is a fantastic time-saving hack.
3. Use Quick Styles
If you’re using a template or working on a document you didn’t create, the formatting on different parts of the text may not be immediately clear. But, you can look at the styles pane, or button depending on which version of Word you’re using, and it’ll tell you whether the text in question is a H1, H2, H3 and so on.
What’s even cooler is that you can create your own quick styles. Let’s say you format text a certain way on the reg. For instance, you make the font size 16, turn the text blue and align it to the center. You can set that exact format, or any format you wish, as a quick style:
Step 1. Highlight the text.
Step 2. Click the Styles pane menu.
Step 3. Select New style.
Step 4. Give your new style a name.
4. Change the Default Font
Though we may not like to admit it, many of us have a preferred font. Maybe you like the style of Garamond or choose Arial because you feel it’s easiest to read. Or perhaps your college or employer etc. has a preferred font that you need to use.
Word’s default font is Calibri. It would be mighty frustrating to change that font every single time you create a document.
Luckily, you can change the default font to suit your needs:
Step 1. Click the font dialog box launcher.
Step 2. Choose your font from the menu.
Step 3. Click Set As Default.
Here, you can also set the default size, style and other font formatting options.
5. Create Tables Quickly
Tables look great in a Word document. They can help you display information visually or make the document look a lot cleaner. The trouble is, creating tables can be awkward.
But, did you know there’s a speedy and simple way to create tables? All you have to do is place tabs or commas between the text you want to separate in a table:
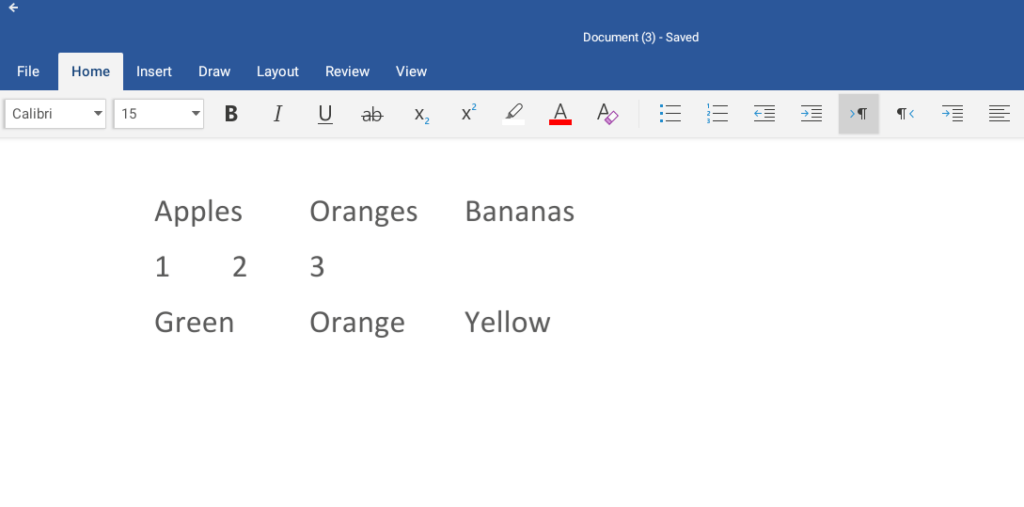
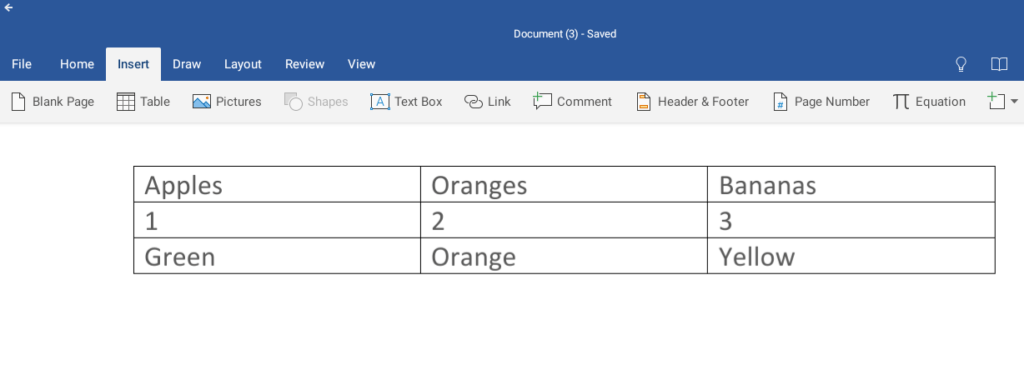
Then highlight the text, go to the Insert tab and click the table icon. And hey presto, a nice, neat table appears around your text:
6. Remove Formatting
Sometimes you might be working on a document and can’t seem to get the formatting right. Or you reach the end of a project and the formatting doesn’t look the way you hoped or expected. In times like these, it may be better to start from scratch and re-do the formatting.
You can remove the formatting of your entire document:
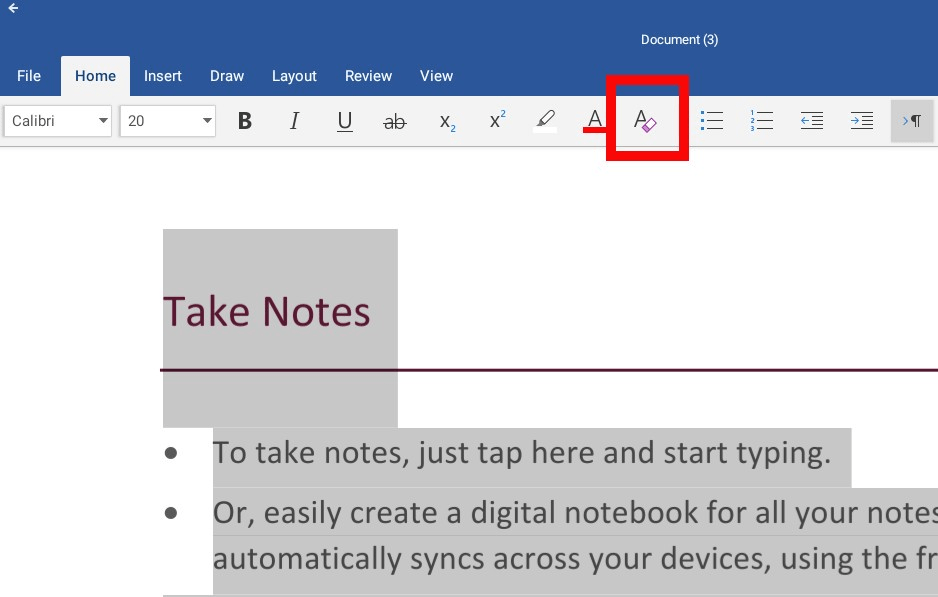
Step 1. Use Ctrl + A to highlight the whole document.
Step 2. Click the Clear All Formatting button – it’s an A with a little eraser:
7. Insert a Table of Contents
Creating a table of contents for your Word document is really easy. But, not everybody knows how to do it.
You don’t have to type and format your table of contents manually. Word will do it for you, using the headers in your document.
Here’s what you need to do:
Step 1. Place your cursor where you want your table of contents.
Step 2. Go to References and select Table of Contents.
Step 3. Choose a style.
If you make edits to the doc that will change the table of contents, don’t forget to right-click the table of contents and click Update field.
8. Use Section Breaks
You may run into difficulty if you want formatting to only apply to one page or part of a page. For example, you may wish to have just one landscape page in the middle of your document or perhaps you want your appendix page to look different from the rest of the doc. The reason this kind of thing might prove difficult is that when you alter formatting in Word it applies the changes to the entire document.
The workaround for this is to add in section breaks. Then, any formatting changes will only apply to the section you’re using.
To add in section breaks go to Layout and then Breaks. You’ll see a few different options for section breaks:
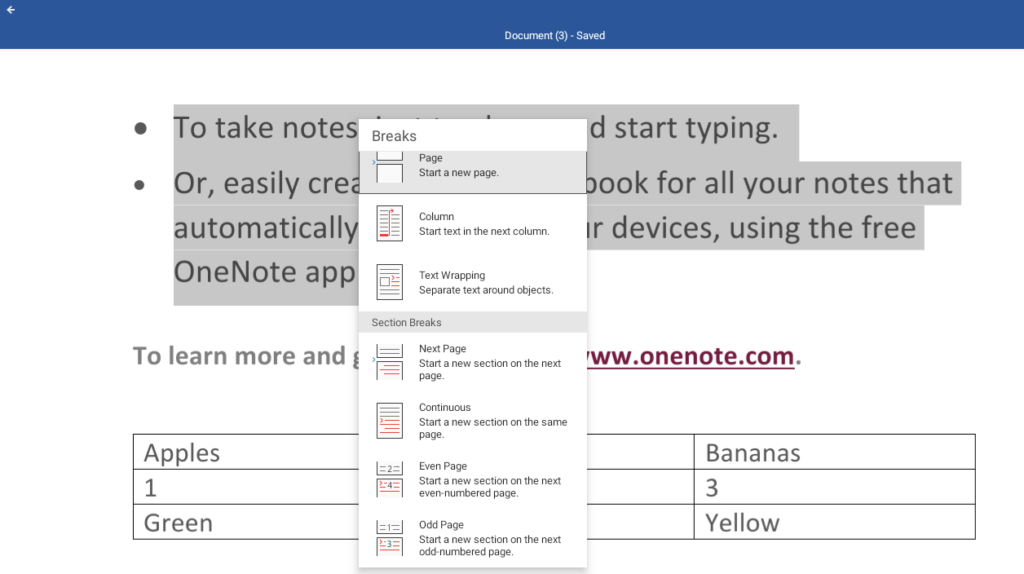
Select Next Page if you want the formatting to be different on the next page or Continuous if you need to alter the formatting on the same page.
9. Change the Formatting of Copied Text
When you copy and paste text from a website, for example, the copied text retains its original formatting, i.e. how it looks on the web page you got it from. You’ll more than likely want to change this so that the copied text fits in with the rest of your document.
To do this:
Step 1. Right-click where you want to paste the text.
Step 2. Click the arrow next to the paste icon.
Step 3. Select Keep Text Only.
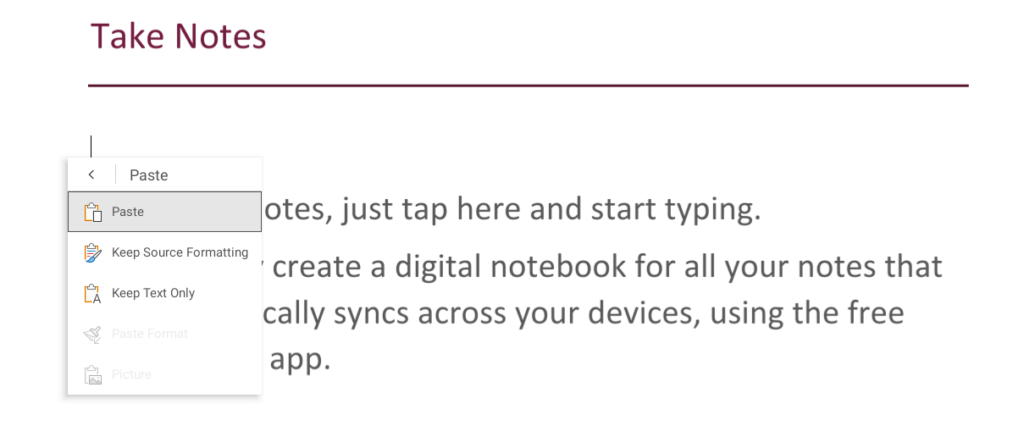
The text that you paste will now match the formatting of your document.
Summing Up
Using the paragraph symbol and other formatting marks can be beneficial. Their main use is to check your document for formatting errors.
Switching paragraph symbols on or off is a matter of checking or unchecking a box in the Display menu.
There are lots more ways you can make formatting your document simple. Setting your own quick styles, for example. Or removing formatting altogether to start from scratch.
Hopefully, with all of this advice, you’ll become a formatting whiz very soon.

