The Beginner’s Guide to Office 365 Planner
Microsoft Planner is an Add-in for Office 365 that helps you organize teams and stay on top of your projects. It’s incredibly easy to use, fully integrated with all of your Office apps, and free so long as Planner is included with your Office 365 subscription.
Essentially, Office 365 Planner is Microsoft’s way of making sure their subscribers don’t have to rely on third-party apps for project management. It’s fairly lightweight—more like Trello than Asana—but as one of many excellent Add-ins for Office 365, Planner is constantly improving.
If you’ve never worked with Planner before, don’t worry: 80% is straightforward. We’ll cover the 20% that trips people up, including a quick tutorial.
Overview of Office 365 Planner
With Office 365 Planner, you can create and monitor detailed plans in a clutter-free space. On the left hand panel, you’ll see a few options:
- New plan launches Planner and builds an Office 365 Group for anyone you invite to the plan.
- Planner hub lets you oversee all your plans. You can favorite plans to keep them in focus or see the most recent first.
- My tasks lets you see the upcoming tasks broken out from all your associated plans.
As an organization tool, Office 365 Planner is simple, clean, and agile. For users who have worked in Kanban or Scrum environments, Planner will be intuitive.
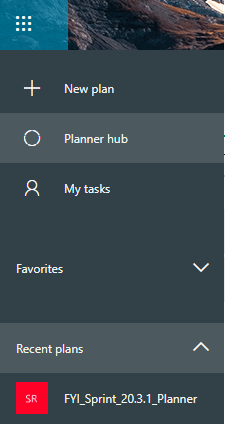
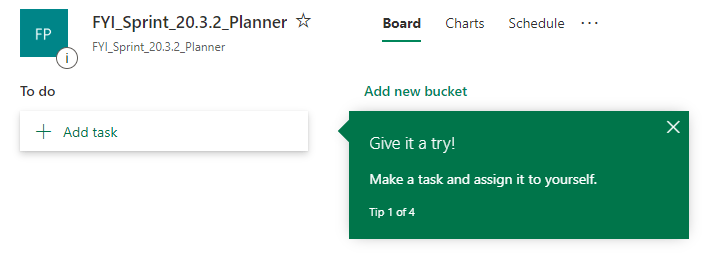
Here’s a Office 365 Planner example I just put together, as seen in board-view:
You can see the basic breakdown of tasks visualized as cards, which are organized in buckets. You might as well be at a whiteboard, and that’s the idea.
- Tasks are actions that need to be completed as part of the project. Each task has a digital card where you can assign people, start/end dates, and a priority level. As you learn more about your project, you can add files, notes, and updates to the task. When it’s complete, you can remove the task from view without losing any important information. (More on how to complete actions like this in the tutorial below.)
- Buckets are the categories that help you quickly distinguish relevant features of tasks, such as status or classification. You can drag and drop tasks from one bucket to another as a project progresses, or as different people need to take the lead.
The board grows as you add new tasks and buckets, but this is only one of the ways you can visualize your project in Planner. At the top of the window, you can switch between three different views in Office 365 Planner:

There’s Board, which we’ve been looking at, but also Charts and Schedule. Toggling between these views transforms your raw Planner input into useful visuals that are easy to share.
In chart-view, you get an overall sense of how things are progressing, as well as tools to narrow your focus. Get a 30,000-foot view, or drill down into specific areas of the workload to look for patterns and problems.
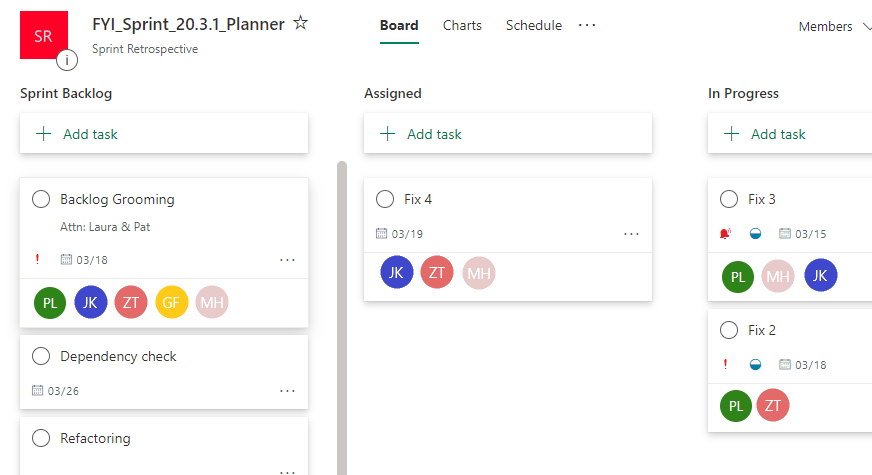
In the mockup below, there’s a clear status breakdown, along with a snapshot representation of tasks and buckets:
You can add and edit tasks in charts, just as you can in board-view. And if you keep scrolling, you’ll see Planner has charted the data along a few different axes to illuminate different aspects of your plan.
How exactly Planner slices the data is up to you. On the right-hand side you can see options to Filter down your tasks and “Group by Bucket.” As you populate Planner with more and more information, these filters help you dig for answers and data.
Speaking of keeping track, the third viewing mode of Office 365 Planner is Schedule. Here, the details of each task are mapped over the days ahead.
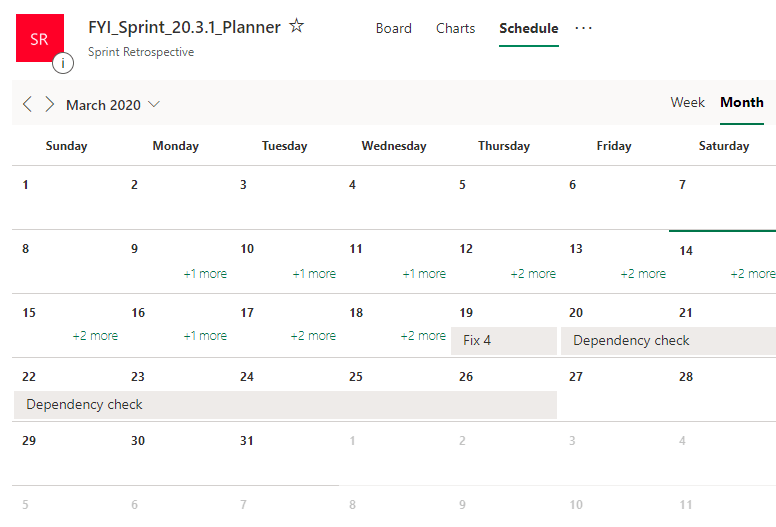
This is a nice way to think about what “realistic” looks like as you plan out the workload. View by week or month and see the plan in real-time, synced with everyone on the team.
You can also extend or shorten deadlines and move tasks from one day to another with a single click. This is huge for anyone who doesn’t know exactly when they can meet with clients.
All changes you make in Calendar will be reflected on your board and charts. If you want, you can add your Planner to Outlook, and it’ll generate a link to share. That way, everyone can see the plan with their own schedule.
Office 365 Planner’s shareable calendar-view is a superb feature for surfacing conflicts with people’s other work responsibilities and personal lives—before problems arise.
Along those same lines, you can use Schedule proactively to test out changes to the plan to see how they will affect everyone involved. Get a sense of what an adjustment would look like before diving in.
Best reasons to use Office 365 Planner
Up to this point, we haven’t talked about anything groundbreaking. The board, chart, and schedule functions are already staples of a million free-ish project management apps.
But here’s what stands Office 365 Planner apart:
- It’s built on Office 365 Groups, which means that when you bring together a team in Planner, Azure AD automatically provisions all members with a shared inbox and OneDrive storage. You don’t have to worry about sharing permissions or asking for support getting set up.
- It’s integrated with Office Apps. No one beats Microsoft at their own game. Features work smoothly, and you can leverage team knowledge from SharePoint, OneDrive, and Outlook from within Planner.
- Email notifications are easy to control in Planner. Help the team keep track without overloading their inbox.
- It’s great on mobile. Whether you use Android, iOS, or Windows, you’ll be able to download the Planner mobile app to stay connected on the move.
If you don’t already use Office 365, Planner isn’t the feature that will put you off. But if you do use Office 365, and you have a qualifying subscription, Planner is already included for free.
In that case, why not use it? Especially if you’re paying for another service to accomplish the same thing.
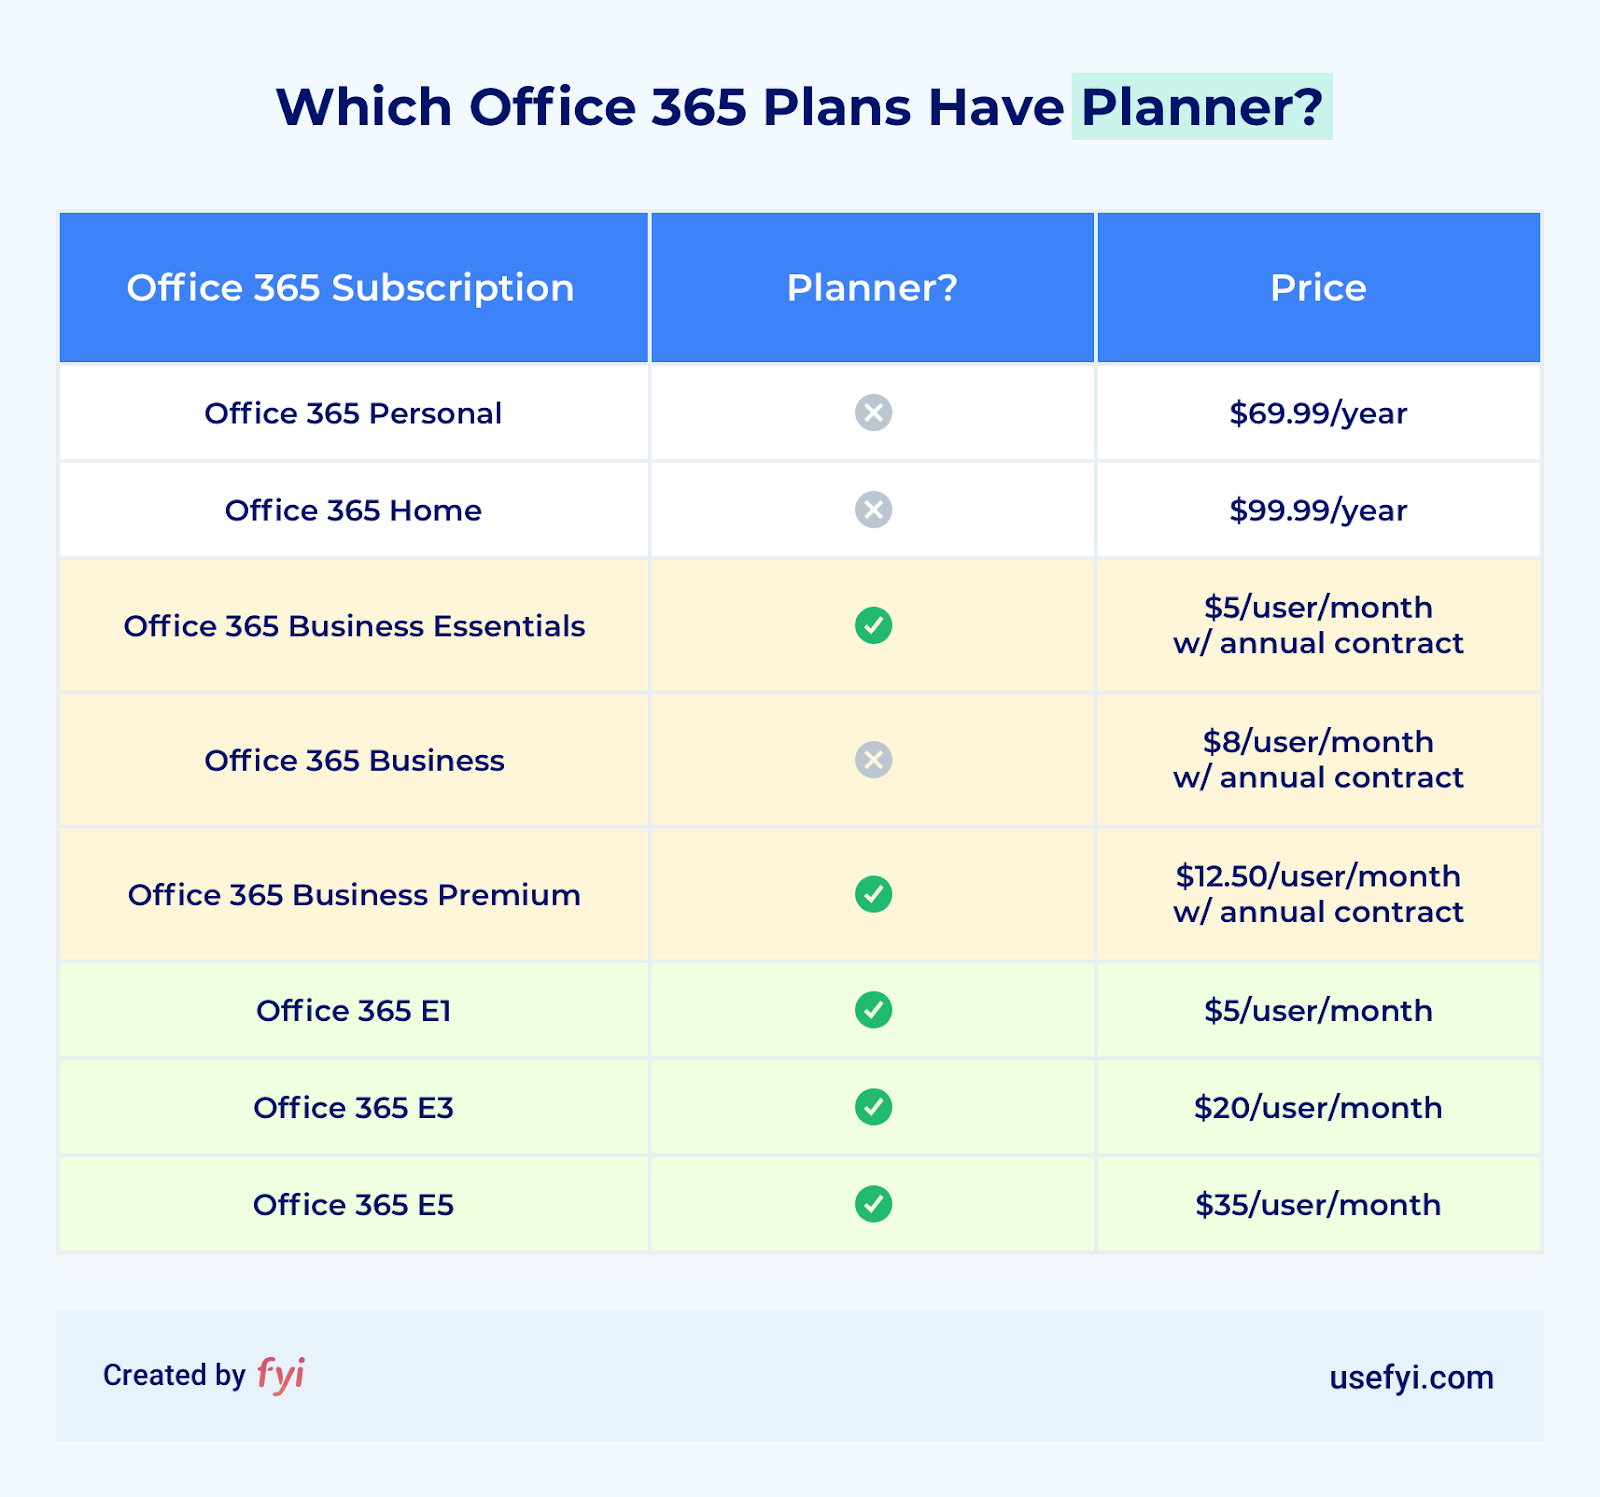
Which Office 365 plans have Planner?
This breakdown shows which of the main Office 365 subscriptions include Planner:
One thing to take away from the breakdown is that Planner comes with Office 365 Business Essentials, which is only $5 per month, and comes with an entire cloud-based productivity suite.
So if you’re spending that much—or even near that—on lightweight project management software, I’d think about making the switch. At least see what you would get in addition to Planner (SharePoint, Teams, Outlook…) with an Office 365 Business Essentials subscription.
Since Planner is only three years old at the time of writing, plenty of folks who have it don’t even know. If your company has an Office 365 subscription that includes Planner, you should take a hard look at the extra cost of paying for something similar.
How to do key tasks in Office 365 Planner
Microsoft had a lot of inspiration for its design, so it’s a fairly fluid program that knows what you are trying to do and cuts down on the clicks necessary to get it done.
Opening Planner in Office 365
To open Planner, sign into your Office 365 Account. Click on the app launcher.
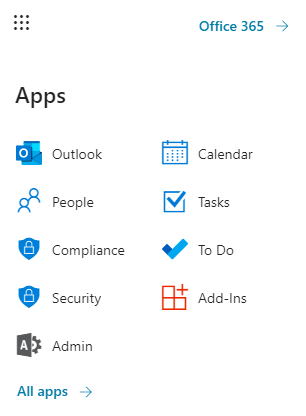
Click “All apps” if you have Planner installed and don’t see it in the App Launcher. Or, select the Add-ins icon if you have never used Planner before, and search for it in Microsoft AppSource.
Alternatively, you can access Office 365 Planner at tasks.office.com as long as you’re signed into your account.
Once you’re signed in, follow the instructions to get started.
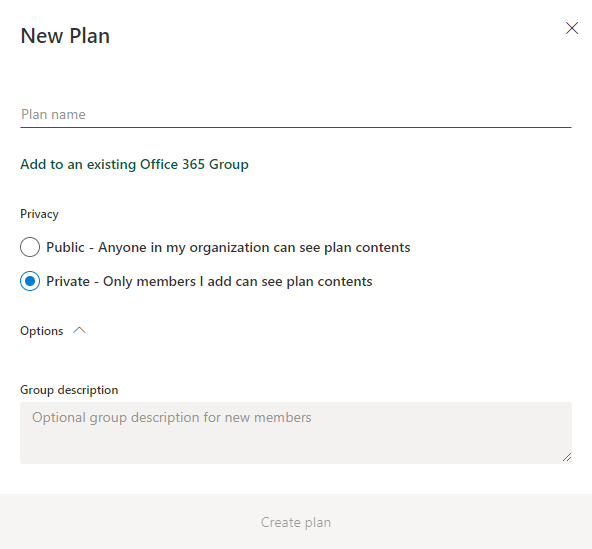
Creating a new Plan
On the left side of your Planner dashboard, select “+ New Plan.” Fill out the basic information to get started:
And that’s it. Your plan is up and running. You’ll see the plan in your dashboard with the ability to get started.
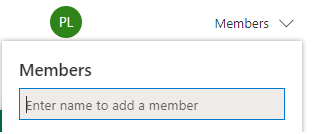
Adding members to Office 365 Planner
To add teammates to Planner, simply click the “Members” tab in the upper right and start typing:
Adding tasks and buckets
In chart-view (though you can make these decisions in any mode), you will see the option to add new tasks at the top of every bucket. You can find the option to add a new bucket at the far right edge of your plan. This may involve scrolling if you have more than several buckets.
Adding detail to tasks
When you click on a task, it opens a new window that lets you add key details to your task:

Viewing a task’s digital card—which you can do from Board, Charts, or Schedule—lets you control every aspect, including:
- What members are assigned to the task
- Progress (Not started, In progress, Completed)
- Priority (Low, Medium, Important, Urgent)
- Start/due dates
- Task notes
- Create/edit checklist
- Team comments
- Add colored tabs (don’t overdo it!)
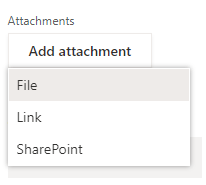
- Add attachments
All of this is incredibly easy. For instance, when you select “Add attachment,” you will have the option to access files directly from SharePoint:
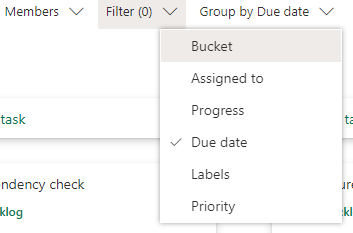
Filtering down tasks and grouping by bucket
Even in the most complex plan, you can quickly focus on specific timelines, card types, or keywords by using the “Filter and Group by Bucket” functions found in the top right corner of your Office 365 Planner dashboard:
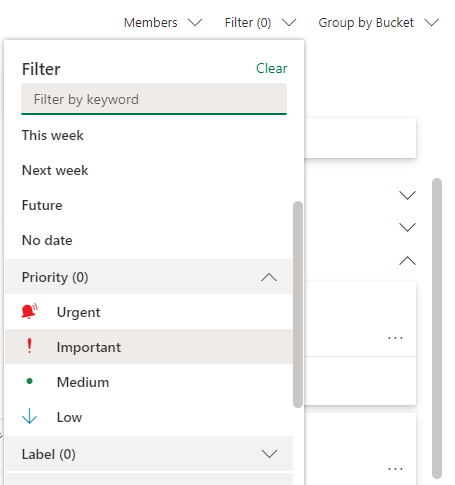
You can also “Group by Bucket,” which adjusts how you view cards in the task panel. You can set to view by deadline, priority or see every task assigned to a specific individual.
Adding plan to Outlook calendar
On the top center of your Office 365 Planner dashboard, click the “more” icon to the right of “Schedule.” If you created the plan, you should see the option to “Add plan to Outlook calendar.”
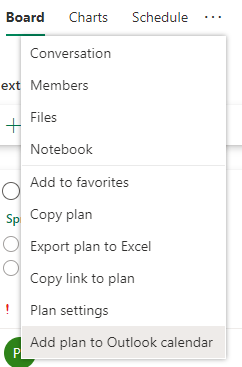
From there, publish the Planner and use the generated iCalendar link to share it with anyone you want.

