How to MLA Format a Google Doc (Step-by-Step)
You don’t want to lose points for silly mistakes in your papers, assignments, or essays. You might think that a little formatting mistake here and there doesn’t matter. But that might not be the case if the person who is grading your essay is particularly strict.
Even established academics need to brush up on their formatting skills sometimes. This is especially true if you’re new to using Google Docs. Or if it’s the first time you’re using Google Docs for a formal piece of work.
Now, there are various style guides for academic work. So, the first thing to do is check, double-check and triple-check what your institution, department, publisher, etc. requires.
If the format is MLA and you’re creating your work in a Google doc, we’ve got you covered:
What Is MLA Format?
MLA style, or MLA format, is a set of guidelines for formatting academic or research papers. It was originally introduced by the Modern Languages Association and used in the fields of literature and language.
Its purpose is to ensure the consistency and uniformity of submitted works. Nowadays, students and scholars of various disciplines use the MLA style.
Here are the basic MLA standards you need to adhere to:
- One-inch margins on the top, bottom and sides
- Indent the first word in every paragraph by one half inch
- Times New Roman font, size 12
- Indent block quotations by one inch
- Double-space the entire paper
- Your last name and the page number in the top-right of the header of every page
- Your full name, instructor’ name, course name and due date at the top of the first page
- The title centralized on the first page
- A Works Cited page at the end of the doc (with sources correctly formatted)
There are quite a few items to check off the list here. But we’ll guide you through:
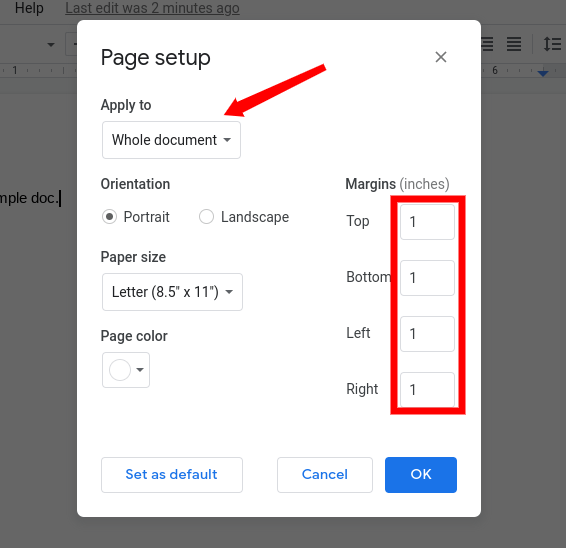
Step 1: Apply One-Inch Margins
Your Google doc should be set to one-inch margins by default. But, you may wish to check to be on the safe side.
1. Go to File > Page setup.
2. Ensure all margins are set to 1 and this is applied to the whole document.
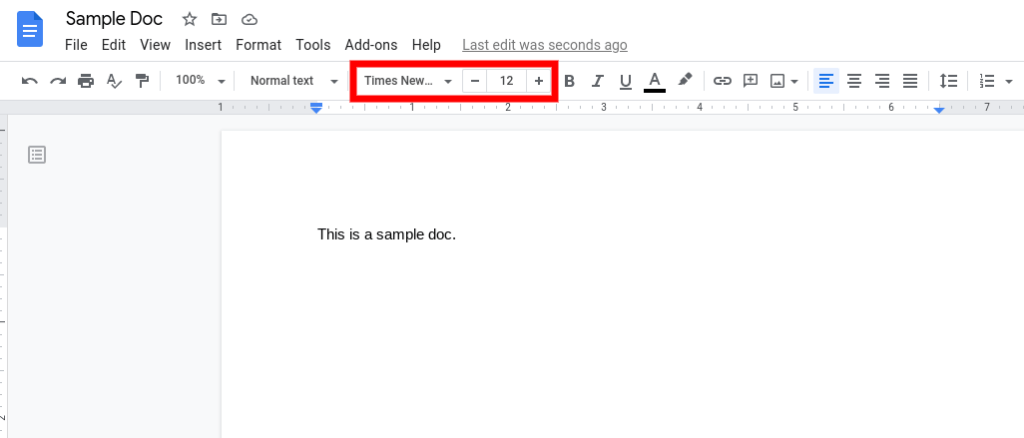
Step 2: Change the Font and Size
1. Choose Times New Roman from the dropdown font menu.
2. Click on font size and select 12.
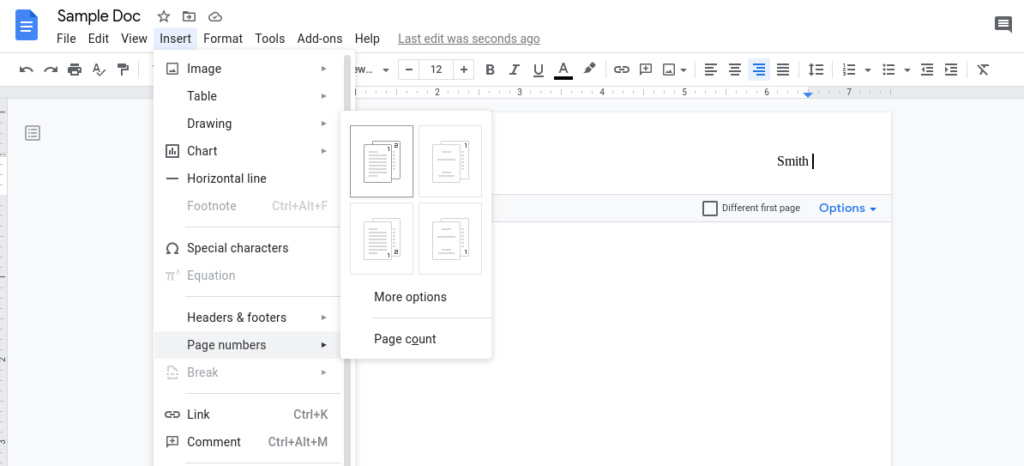
Step 3: Insert a Header
1. Go to Insert > Headers & footers > Header.
2. Click the right align button.
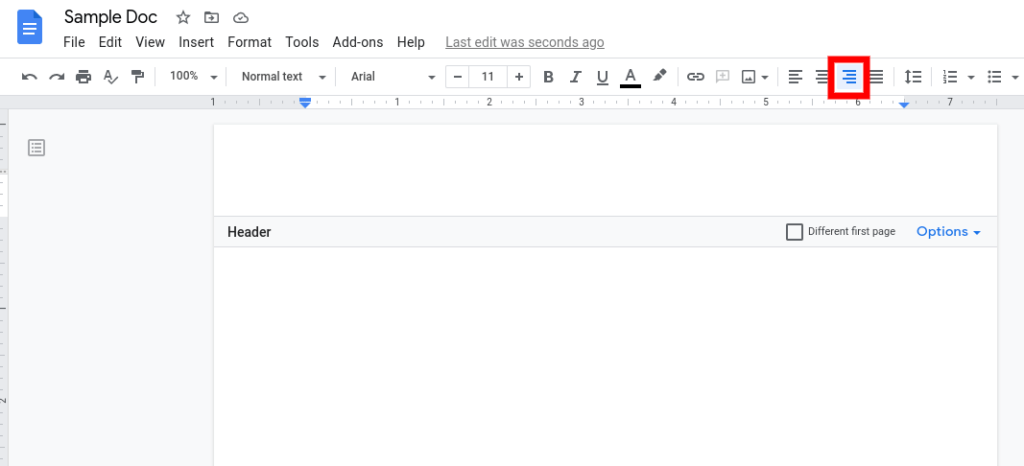
3. Enter your last name and hit space.
4. Go to Insert > Page numbers and click the first option.
If your font defaults back to the original go ahead and highlight your last name and the page number and change them to Times New Roman, size 12.
Step 4: Change the Line Spacing
1. Click the line spacing button in the toolbar.
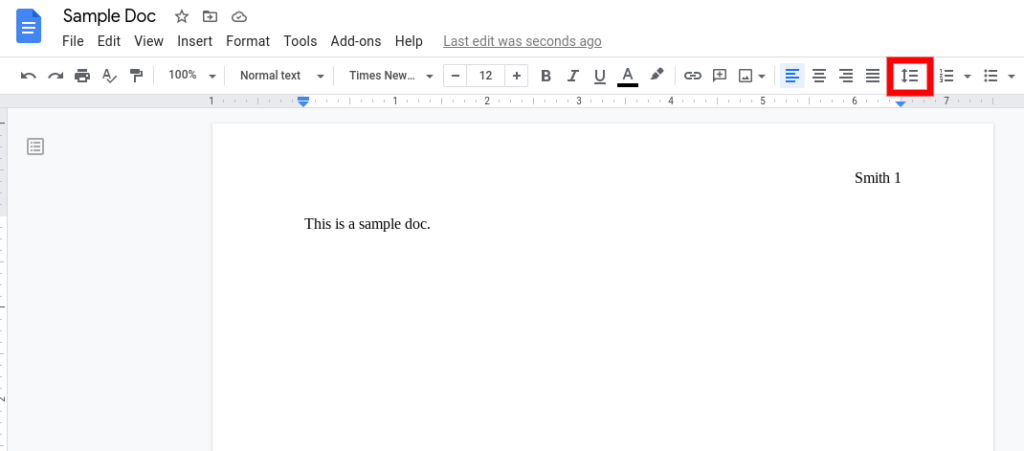
2. Select Double.
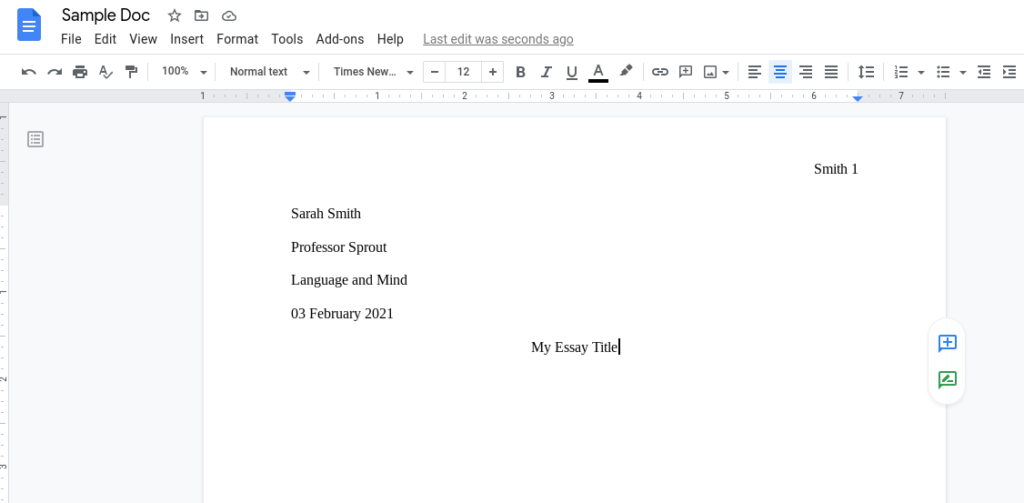
Step 5: Enter Your Details and the Title on the First Page
1. Type in the following on separate lines:
- Your name
- Instructor’s name
- Course name
- Due date
2. Hit the return key then click the center align button.
3. Type in the title of your paper.
Step 6: Add Indentations
Indent Paragraphs
1. Press the tab key to indent the first word of every paragraph.
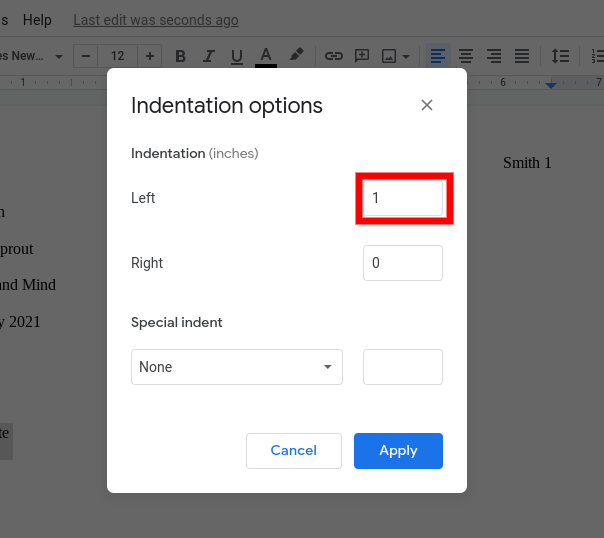
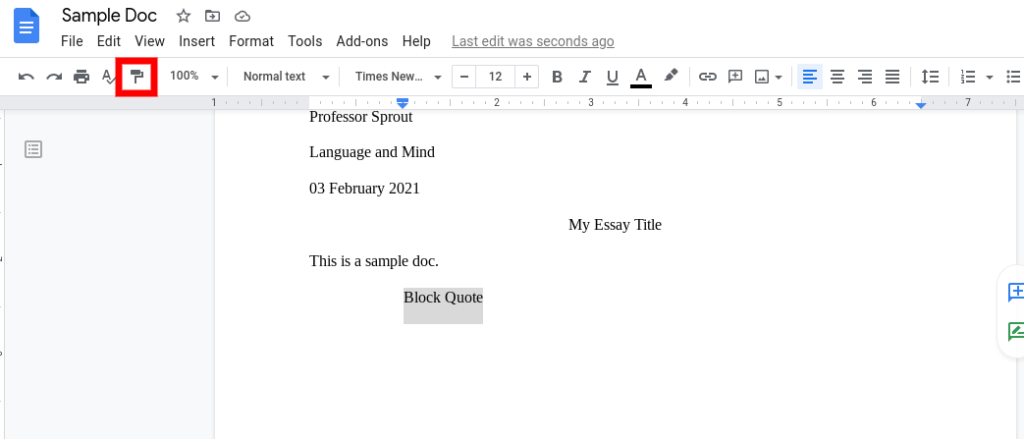
Indent Block Quotations
1. Highlight the text.
2. Go to Format > Align & indent > Indentation options.
3. Next to Left, type in 1 and click Apply.
Step 7: Add the Works Cited Page
The Works Cited page has some unique formatting details. Therefore, there are a few steps you need to complete to format it correctly.
Add a Page Break
After the final paragraph of your paper, you must add a page break to ensure your Works Cited page appears on a separate, new page.
1. Go to Insert > Break > Page break.
Add the Title
As with the main title, the title for this page needs to be centrally aligned.
1. Click the central align button.
2. Type in Works Cited.
Add Your List of Sources
There are a few points from the MLA guidelines you need to incorporate here. First, each of your sources must be listed alphabetically. Ensure you cite your sources in the proper format, for example:
Pinker, Steven. The Sense of Style. Penguin Random House, 2014.
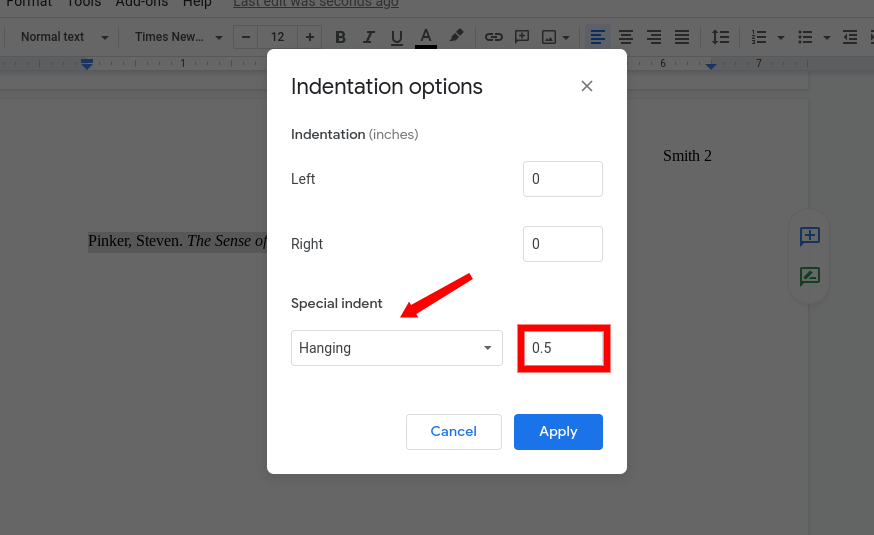
And finally, each source must have a hanging indentation. Here’s how to do it:
1. Go to Format > Align & indent > Indentation options.
2. Click the dropdown menu under Special indent and select Hanging.
3. Set the indent to 0.5 and click Apply.
How Do You Cite in Google Docs?
Google Docs has a citations tool that will help you cite your sources in the proper format as you go along. You can also use this tool to automatically create a Works Cited page when you’ve finished your paper. Naturally, this is super useful as it will help you get the formatting correct every time and save you some time and energy.
1. Go to Tools > Citations.
2. Select MLA from the dropdown menu in the sidebar. (Other options are APA and Chicago.)
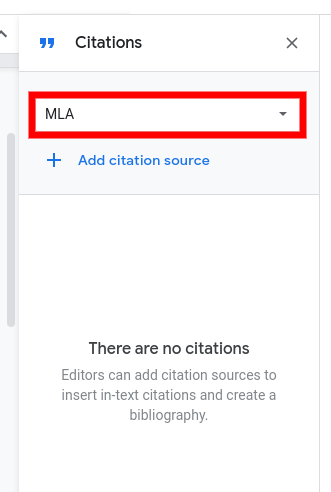
3. Click + Add citation source.
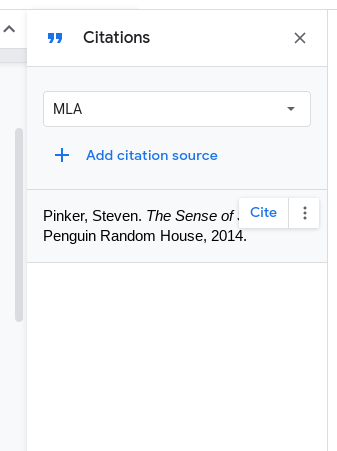
4. From the dropdown menu select a source type, e.g. book or journal, then select how you accessed the source, e.g. print or website.
5. Enter the details of your source into the form. (Click + Contributor if there are multiple contributors.)
6. Click Add citation source.
This will now be added to your list of sources in the citations tool.
7. Place your cursor where you want to cite the source, then click Cite next to the source in the sidebar.
You’ll now see an in-text citation in MLA format. Change the # to the appropriate page number.
8. When you’ve finished your paper, create a new page by adding a page break as mentioned above. Go to the citations tool and click Insert bibliography.
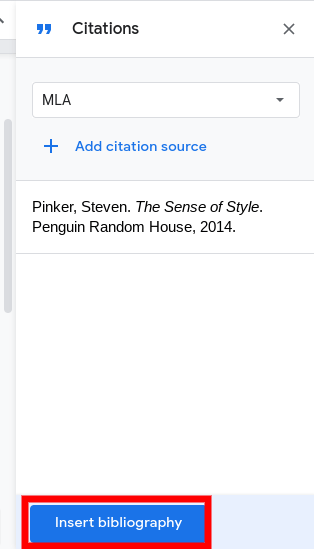
You’ll now see that Google Docs has automatically generated a list of sources in the correct MLA formatting based on the information you entered. You will need to change the title from Bibliography to Works Cited.
You may wish to double-check the formatting of the page for yourself. But, apart from the title, everything should be formatted correctly. Docs even adds in the hanging indentation which, of course, you need for your Works Cited page in MLA format.
How to Use the MLA Template in Google Docs
By far the simplest and quickest way to format your paper is to use a pre-formatted template. Google Docs has a number of templates in different academic styles, including MLA.
The template comes with some text as a placeholder. You just need to replace it with your own details and writing. Here’s how to find and open up the template:
1. Open a new Google doc.
2. Go to File > New > From template.
3. Under the header Education, you’ll see a template entitled Report with MLA written underneath it.
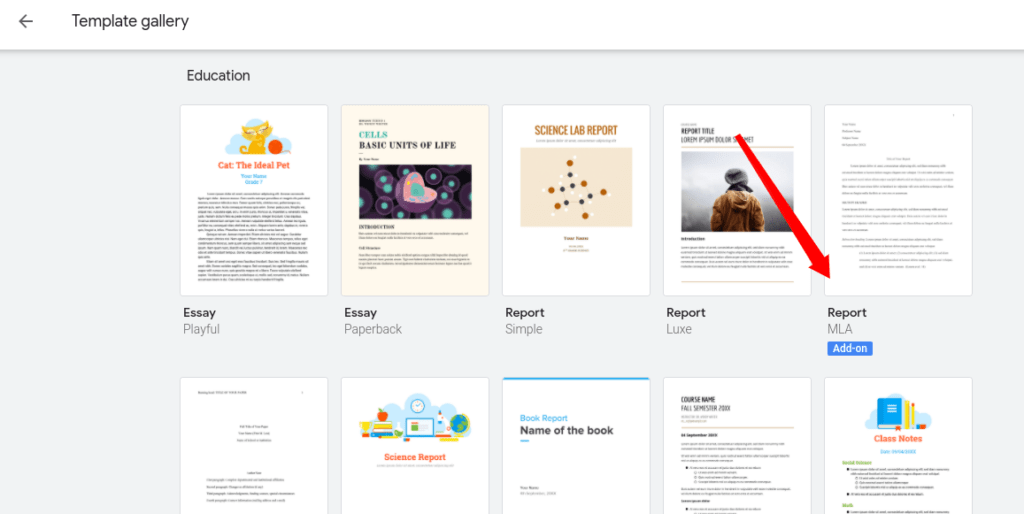
4. Simply click on this template and alter it as necessary.
Note that you may still need to go to the checklist above and double-check that everything is formatted correctly. For example, there isn’t a placeholder for your last name in the header of the template. Thus, you may forget the little things like this if you don’t check through the doc.
More Essay Writing Tips for Google Docs
1. Try Voice Typing
The voice typing tool is a useful tool for students with accessibility needs.
Furthermore, ideas flow quicker than you can get them down on the page sometimes. It might help to use voice typing on such occasions. You can go back to the text to work it into nice, neat sentences for your paper later.
To access voice typing, go to Tools > Voice Typing. Click on the microphone in the small window that appears to start dictating your text.
2. Speed Up Editing
Got a paper due tomorrow and need to make edits fast? It happens. Thankfully, there are ways to speed up the editing process in Google Docs.
First, if you want to reorganize your draft, you don’t need to copy and paste sections or paragraphs. You can simply highlight the text and drag it to its new location in your essay.
Moreover, when formatting your essay, you don’t need to do everything manually. Rather, you can use the paint format button to copy your formatting quickly.
This would be useful, for instance, if you have a lot of block quotations in an MLA style essay and you don’t want to manually indent the text every single time.
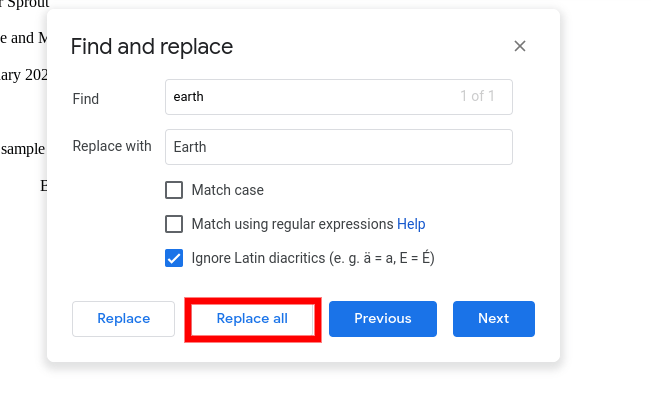
Similarly, if you realize you’ve made a recurring mistake in your document, you don’t have to go through your paper and correct the mistake every time. For example, you may have referenced the wrong author or failed to capitalize a word.
Fix it with the Find and replace tool. Go to Edit > Find and replace. Enter the correction and click Replace all.
3. Make Your Doc Available Offline
There are many instances where offline editing may come in handy. For example, if the wi-fi in your dorm goes down, it doesn’t mean you have to stop working on your essay. Or if you need to make a few quick changes to your doc while you’re on the train.
To turn on offline editing, go to File > Make available offline.
Any changes you make offline will be saved locally on the device you’re using. Then the changes will be synced to Google Drive the next time you go online.
4. Use Bookmarks
Bookmarks are a useful way to draw attention to a part of your essay. You can create bookmarks for yourself. Perhaps you want to come back to a section later and add more.
You may also want to leave bookmarks for an advisor. Say they’re checking your first draft before you submit the final piece.
To add a bookmark in Google Docs, first place your cursor where you want your bookmark to appear. Then go to Insert > Bookmark.
5. Consider Add-Ons
You can do a lot in Google Docs. However, if there’s a tool you need that Google doesn’t offer yet, there’s likely an add-on you can use instead. You may want to add a plagiarism checker or thesaurus to your arsenal, for example.
To browse add-ons, simply go to the Add-ons tab and select Get add-ons.
6. Share or Save Your Doc in the Right Format
There are tons of ways you can share, save or submit an essay using Google Docs. The first thing to do is check with the course advisor how they would prefer you to submit your essay.
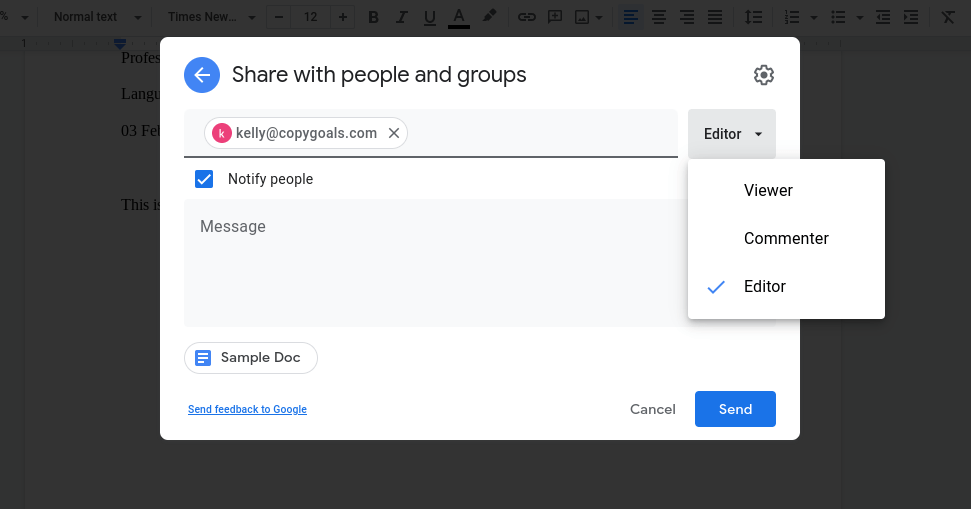
To send it directly to them, click the share button in the top-right corner and enter their email address.
Note that you can add a message alongside your submission. You can also change the permissions of the recipient using the dropdown menu next to their email.
Alternatively, you may wish to create a shareable link which you can also do via the share button. To adjust the permissions here, click where it says Change to anyone with the link.
If you don’t want to send the doc but rather save a copy, go to File > Download. Here you have the option of saving your document in various formats, including .docx and PDF.
This is useful if your advisor wants you to send a copy in a certain format using a file attachment.
Summing Up
Correctly formatting a paper or essay in Google Docs may feel like hard work at first. But, soon enough, it will become second nature. This guide will help you get the fundamentals of the MLA style guide right.
It’s up to you whether you wish to use the MLA template for your paper. But, we’d recommend manually formatting your work in the MLA style if you have the time. This way you know for sure there are no formatting mistakes.
Finally, don’t forget that Google Docs is rich in useful features that could help you during the writing, editing and formatting processes. Go explore what Google Docs can do.

