How to Delete A Page in Word – The Easiest Way
Microsoft Word is deceptively complex. This could be a good thing – at least it means the word processor is rich in features.
Yet, sometimes the complexities catch you out and the results get right on your last nerve.
For instance, you may come across a random blank page in your document. The odd thing is, that it’s probably not blank at all. There’s likely hidden formatting in the background that makes the page harder to get rid of.
Without this knowledge, you could be left scratching your head for a long time.
So, we put together this guide to show you the easiest ways to delete pages with or without content on any device. Plus, you’ll learn what to do when you just can’t get rid of that pesky page.
How to Easily Delete a Page in Word – Windows
If you’re a Windows user, there are a few ways to delete a page in Word. Simply, highlighting text and hitting the backspace key (Method 1) is by far the simplest and quickest way to do it. It’s also a method that you’re probably used to.
Yet, some scenarios may call for other methods. You may even find these other methods more convenient.
Or, if you run into issues using method 1, i.e. you find yourself unable to delete a page, then you can try the other methods until one works.
Method 1: Delete Content
This is the easiest way to delete a page if you’re using Word on Windows:
Step 1. Select the text, graphics, images etc. on the page you want to delete.
Step 2. Hit the Delete or Backspace key.
Method 2: Use a Shortcut
Perhaps, you don’t want to highlight the text manually. For instance, you might be concerned you’ll highlight too much and accidentally delete content from the next page, too.
So, here’s another method, in which Word will highlight only the content on your chosen page for you:
Step 1. Place your cursor anywhere on the page.
Step 2. Press Ctrl+G. This will open the Go To tab in the Find and Replace window.
Step 3. Type \page in the box under Enter page number.
Step 4. Press the Enter key then click Close.
Step 5. Ensure the content on your chosen page is highlighted, then hit the Delete or Backspace key.
Method 3: Use the Navigation Pane
If you’re working with a particularly large document, scrolling through and trying to find the content you need to delete might be difficult and time-consuming.
This method will help you locate the page(s) you want to delete quickly and easily:
Step 1. Click the View tab and tick the Navigation Pane box.
Step 2. You’ll now see thumbnails of all of your pages on the left of your screen. Find and click the page you want to delete.
Step 3. Your cursor will be at the top of the page. Hit the Backspace or Delete key.
How to Easily Delete a Page in Word – Mac
The way to delete a page in Word on Mac is very similar to the way you would delete a page on Windows. Again, you can highlight the content on the page you want to delete and hit the Delete key.
You can also use the Navigation Pane to locate and delete pages in the same way as above.
Or use the shortcut method. The only difference is the shortcut you’ll use to highlight the right content:
Step 1. Click or tap anywhere on your chosen page.
Step 2. Press Option+⌘+G.
Step 3. Type \page where it says Enter page number.
Step 4. Hit the Enter key and click Close.
Step 5. Ensure the content on the page is selected, then press the Delete key.
How to Easily Delete a Page in Word – Android
If you’re on an Android phone or tablet, you’ll have the app version of Microsoft Word, rather than the desktop version. The app is a pared-down version, meaning it doesn’t have all of the features of the desktop version.
Thus, to delete a page in Word on Android, you’ll need to highlight the right content and then delete it. Here’s how:
Step 1. Double tap the content on the page you want to delete.
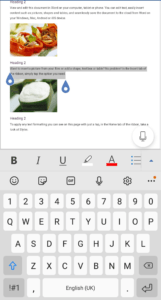
Step 2. Expand the parameters to highlight all of the content on that page.
Step 3. Tap the delete icon.
How to Easily Delete a Page in Word – iOS (iPad and iPhone)
Again, if you access Word via your iPad or iPhone, you’ll be using the app. Therefore, the quickest and easiest way to delete a page is the same on iOS and Android.
Take a look:
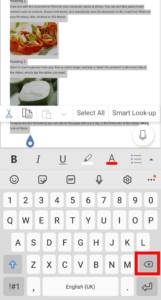
Step 1. Highlight the content on the page by double-tapping.
Step 2. In the options that appear above the text, tap the delete icon.
How to Remove a Blank Page in Word
One of the most common pagination issues in Microsoft Word is the appearance of a blank page at the end of a document. Where on earth does this random blank page come from?
Well, Word automatically places a final, non-deletable paragraph at the end of every doc. Thanks a lot, Word! Every so often this paragraph carries over onto a blank page. Hence, the extra page at the end of your doc.
Fortunately, there are a few ways to fix this issue:
Method 1: Change the Font Size
When you change the font size for the end-paragraph, it should fit on the preceding page. Here’s how to do it:
Step 1. Bring up the Show/Hide tool with the shortcut Ctrl+Shift+8 (⌘+8 for Mac users).
Step 2. Select the paragraph symbol.
Step 3. Highlight the paragraph symbol for the end-paragraph.
Step 4. In the formatting box that appears, change the font size to 01 and press Enter.
Step 5. Turn paragraph marks off again with Ctrl+Shift+8 (⌘+8 for Mac).
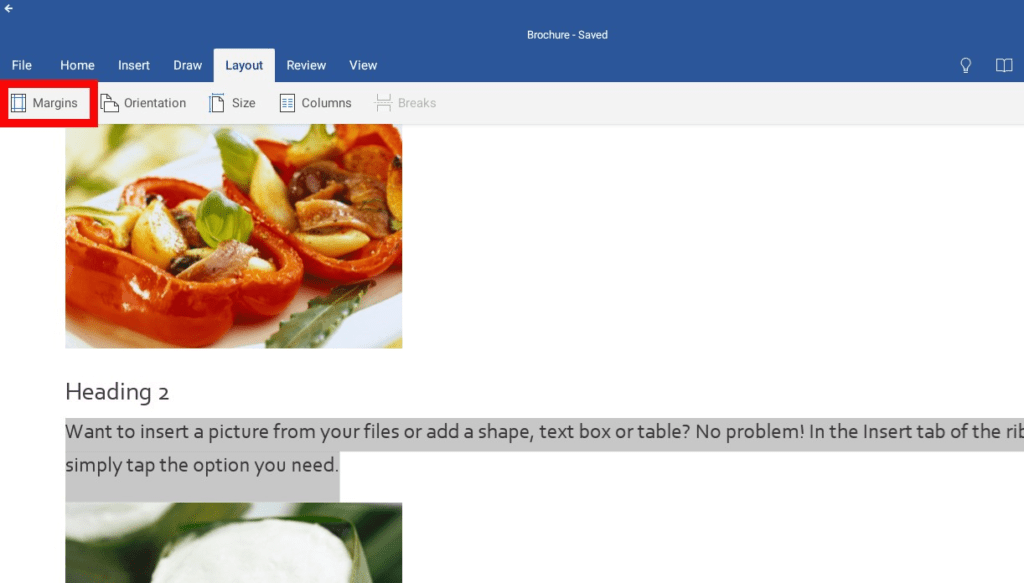
Method 2: Change the Margin Size
If there’s still a blank page after you change the font size, the next step is to make the bottom margin smaller. Here’s how:
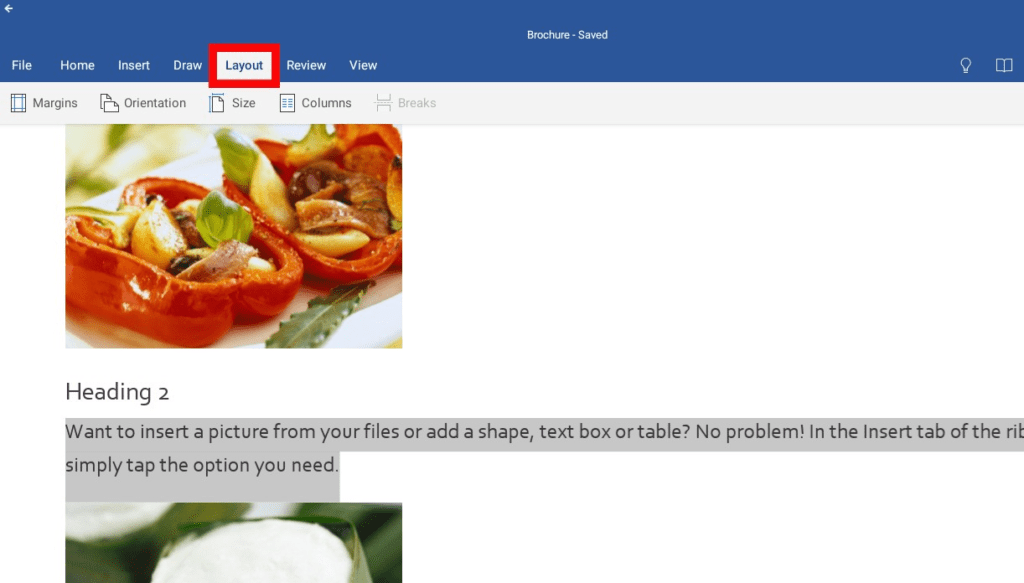
Step 1. Click the Layout tab.
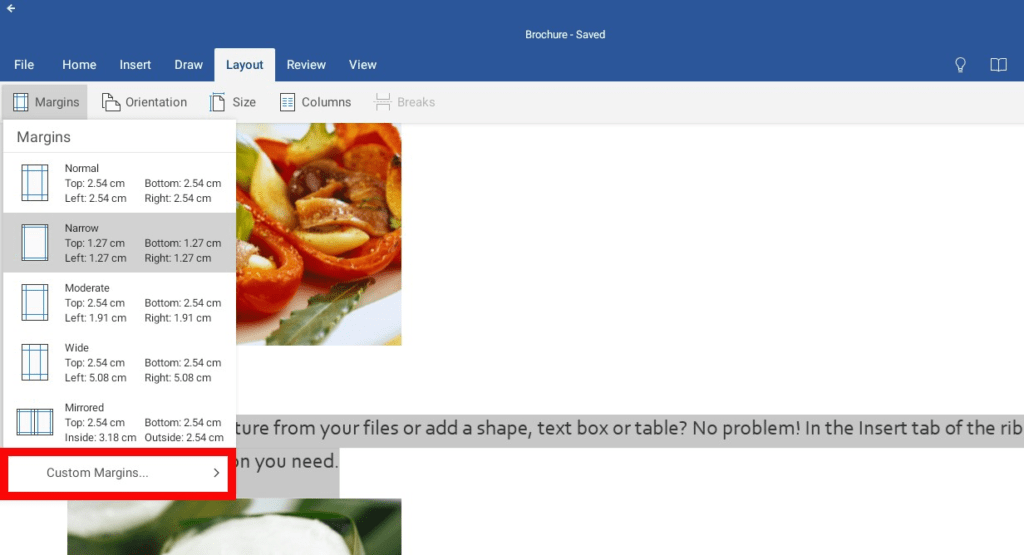
Step 2. Select Margins.
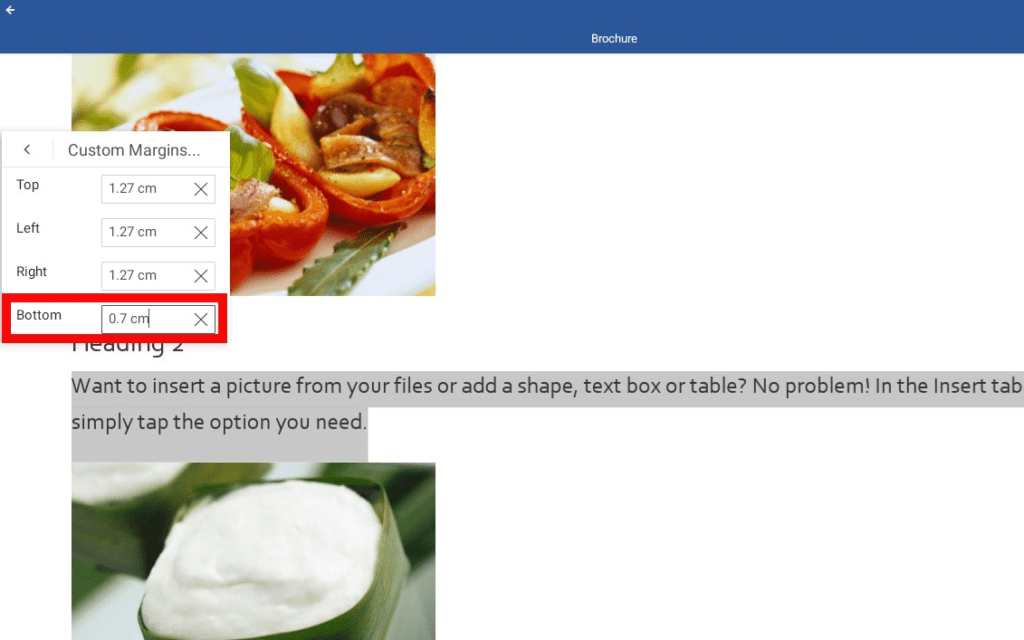
Step 3. Select Custom Margins.
Step 4. Change the bottom margin to something small, e.g. 0.7 cm.
Method 3: Convert It to a PDF
You can also save your document as a PDF and omit the final, blank page:
Step 1. Click File then Save As.
Step 2. Next to Save as type, select PDF.
Step 3. Go to Options.
Step 4. Under Page Range, set your Pages From and To, leaving out the last page.
Step 5. Click OK and then Save.
What to Do When the Page Won’t Go Away
There may be some further formatting issues that prevent you from deleting a stray page.
Usually, you can work out where the problem lies by first displaying hidden formatting marks and going from there.
1. Alter Section Breaks
A section break may create a blank page in the middle of your document if it’s set to Next Page. In this case, you’ll have to change it to a continuous section break so that your sections flow after one another.
Here’s how:
Step 1. Show section breaks by pressing Ctrl+Shift+8 (⌘+8 for Mac).
Step 2. Highlight the section break that’s generating the blank page.
Step 3. Go to the Layout tab and select Breaks.
Step 4. Under Section Breaks, select Continuous.
2. Delete Section Breaks
A section break may also generate a blank page at the end of your document if it’s set to Next Page, Even Page or Odd Page. Again, you’ll need to display the document’s formatting marks and then delete the section break:
Step 1. Use the shortcut Ctrl+Shift+8 (⌘+8 for Mac) to display section breaks.
Step 2. Position your cursor before the section break at the end of your document.
Step 3. Hit the Backspace or Delete key.
3. Delete Page Breaks
When you add a page break, it automatically tells Word to start a new page. This is another reason there might be a blank page in the middle of your document. Here’s what you need to do to fix it:
Step 1. Press Ctrl+Shift+8 (⌘+8 for Mac) to display page breaks.
Step 2. Highlight the page break that’s causing the blank page and delete it.
4. Remove Extra Paragraphs
Extra paragraphs can also result in large amounts of white space or blank pages in a document. Display paragraph marks to locate any extra paragraphs hidden within your doc:
Step 1. Press Ctrl+Shift+8 (⌘+8 for Mac) and select the paragraph symbol.
Step 2. Delete extraneous paragraph marks to remove the blank space.
5. Remove White Space After a Table
Is there a table at the end of your document?
Word always places some white space underneath tables. There’s a chance this white space could get pushed onto the next page of your doc and again, leave you with the dreaded blank page at the end.
Here’s how to fix this problem:
Step 1. Press Ctrl+Shift+8 (⌘+8 for Mac) and enable paragraph marks.
Step 2. Right-click the paragraph symbol next to your table.
Step 3. Select Paragraph then Indents and Spacing.
Step 4. Change spacing to zero.
If this doesn’t work, you can try hiding the paragraph:
Step 1. In Home, open the Fonts tab.
Step 2. Find the Effects section and check the box next to Hidden.
How to Move a Page in Word
Maybe you don’t want to get rid of a page entirely, but rather move it elsewhere within your document.
Let’s say, for example, you’re creating a pamphlet and want to reorder your pages so the most important information comes first. Or perhaps you took notes at an important meeting or in class and you think the information would make more sense in a different order.
Whatever your reason is, there are a couple of simple ways to move a page in Word:
Method 1: Reorder Pages in the Navigation Pane
As you’ve seen, the Navigation Pane can be mighty useful as it gives you an overview of your pages. Adjust the Navigation Pane so that it shows the headings for each of your pages. From there, you can drag and drop headings as you please. It’s a straightforward way to rearrange your document:
Step 1. Go to the View tab.
Step 2. Tick the box for the Navigation Pane.
Step 3. In the pane, click Headings.
Step 4. Click on the Heading for the page you want to move.
Step 5. Drag the heading to a different location in the list.
Method 2: Cut and Paste a Page
Perhaps the most obvious way to move a page in Word is to cut and paste it to a new location. This is likely to work well if you just have one page that you want to move. But, it will take a lot longer than the first method if you need to move multiple pages.
Nevertheless, here are the steps:
Step 1. Highlight all the content on the page you want to move.
Step 2. Press Ctrl+X to cut the content.
Step 3. Find the location of your new page and press Ctrl+V to paste your content there.
Summing Up
Deleting pages in Word is relatively simple. Deleting blank pages is a bit more difficult. It all depends on what caused there to be a blank page.
But, it’s still possible, if you troubleshoot the issue using the methods outlined here.
If the blank page is at the end of your document, then the problem is likely something to do with the end-paragraph that Word automatically generates. If it’s in the middle of your doc then there may be an issue with extra paragraphs, page breaks or section breaks.
Once you get to grips with Word’s formatting settings, particularly formatting marks, then you should be able to solve any formatting issue easily.

