The Beginner’s Guide to Google Docs Outlines
When writing a multiple-page document using Google Docs, you may want to give readers the ability to jump around in the document. If someone doesn’t need to read the document cover to cover, having the ability to find and scroll ahead to pertinent information allows readers to work more efficiently.
The best way to provide an overview of the information in your document is through the Google Docs outline feature. This tool automates the process of creating an outline in your Google Doc, saving you time.
Your readers will appreciate it when you provide a Google Docs outline with your multi-page documents. Here are some tips for using this feature successfully.
What Is the Google Docs Outline?
When you were writing a formal paper in high school or college, your instructor may have asked you to create an outline before starting the writing process. By asking you to create an outline, the idea was you would think about how you wanted to organize the paper, coming up with major topics and subtopics.
Following the outline gave you a plan and structure to follow for creating the paper, so you didn’t forget any of your main points.
The Google docs outline works a lot like your essay outline, but for your reader. With the outline visible on the screen, the reader can see your main points in one location, rather than trying to scan the document to pick them out.
With the Google Docs outline feature, you’re doing the process in reverse. After writing the document, you’ll tell the app to create an outline automatically.
Where to Find the Outline in a Google Doc
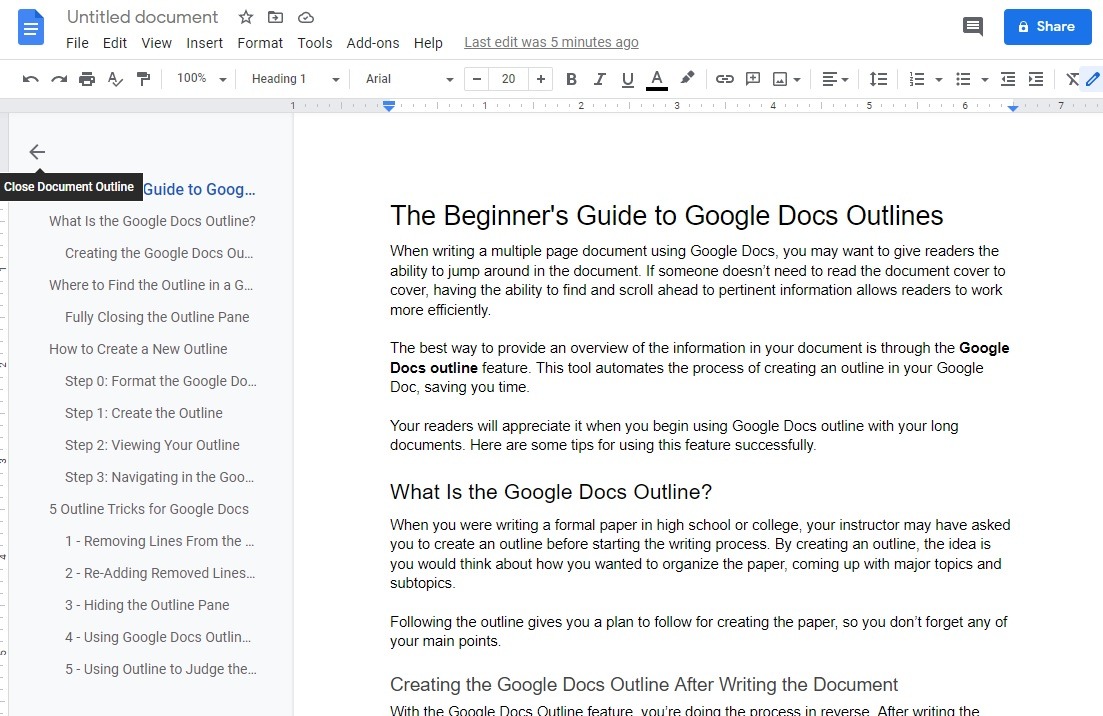
After you create an outline from your Google Doc, it will appear in a separate pane on the left side of the screen. The Google Docs app will split the screen vertically, placing the outline on the left and the document on the right.
As you scroll through the document on the right, the outline view will scroll along with you, if it is long enough that its listings don’t fit on one screen. You also can scroll through the outline entries separately from the document.
How to Create a New Outline
When you’re ready to make your first Google Docs outline in a document, follow these steps.
Step 0: Format the Google Doc With Headings
When preparing to use the Google Docs outline tool, to automate the creation of the outline, you must use headings throughout the document to organize your ideas.
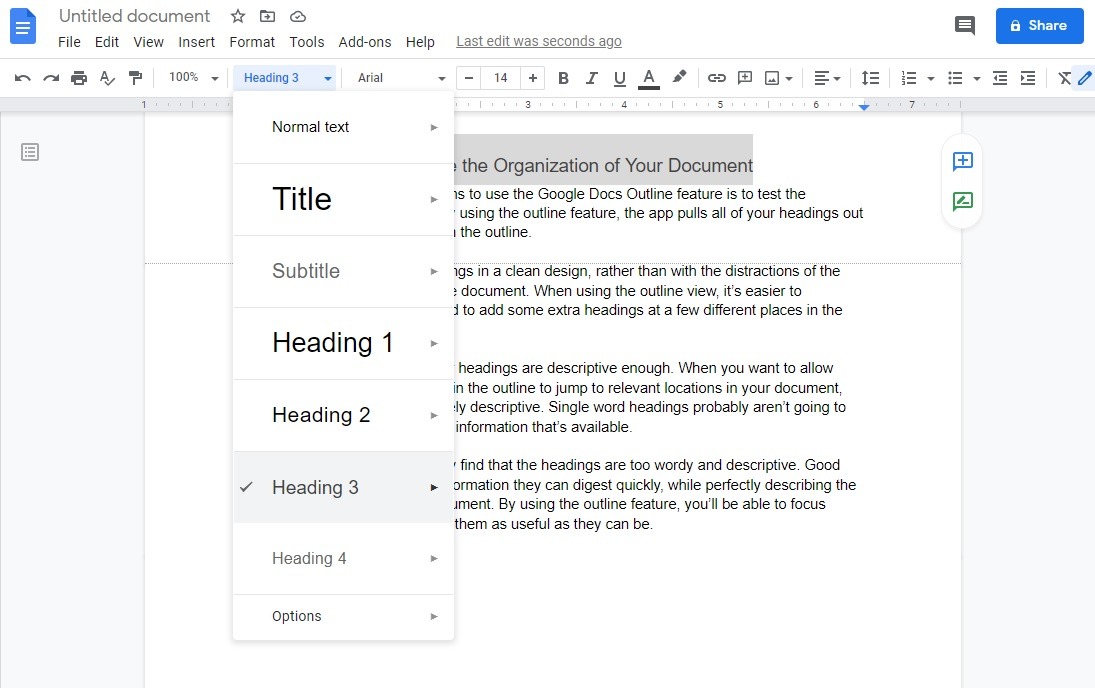
To create headings in your Google Doc, add brief phrases to introduce new ideas and sections. Highlight the phrase that you added. Then click on the Normal Text button in the ribbon menu. In the popup menu that appears, select the heading you want to use.
- Heading 1: Heading 1 is for main ideas, so you should use it less often than the other headings.
- Heading 2: Heading 2 is for subsets of the Heading 1 ideas. Using at least a couple of Heading 2 phrases under each Heading 1 is best.
- Heading 3: Heading 3 is for subsets of the Heading 2 ideas. You don’t have to add Heading 3 phrases in every Heading 2 section, though.
- Heading 4: Heading 4 is for subsets of the Heading 3 ideas. Using Heading 4 phrases may clutter your Google Docs outline, so you may not want to use them when you know you will be adding an outline to the document. (Or you can remove the Heading 4 lines from the outline using the technique we’ll describe in the tricks section below.)
You can add headings to your document after you’ve written it by highlighting the text you want to turn into a heading and using the popup menu, or you can add headings as you’re writing the document. Use the Normal Text setting for the segments of the document between the headings (the main body text).
Step 1: Create the Outline
Once you have the headings added to your document, creating the Google Docs outline only requires a couple of clicks.
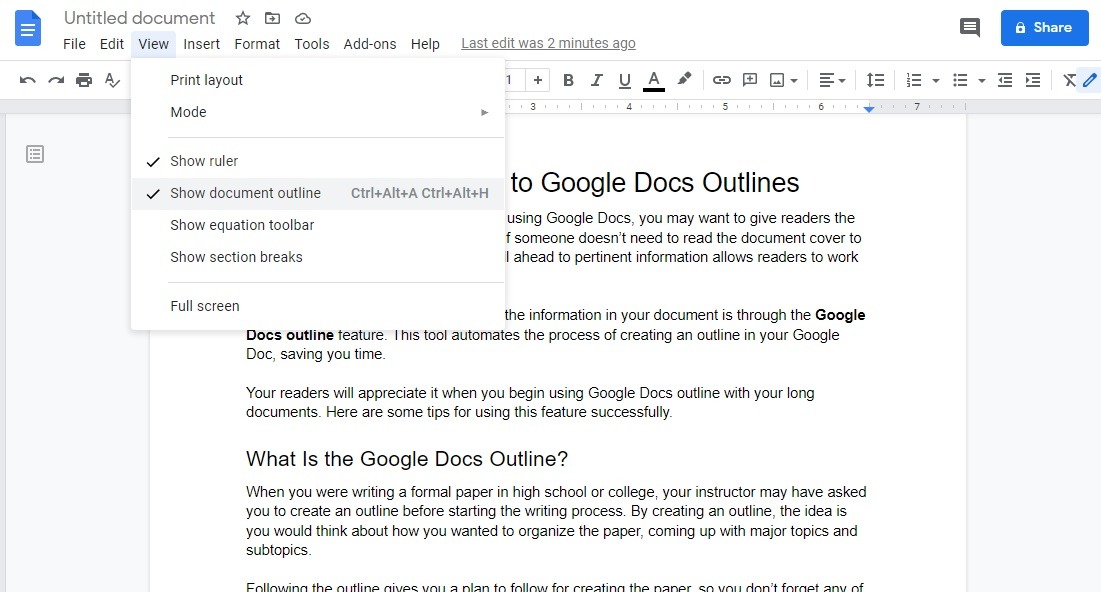
Click the View menu in the upper left of the Google Doc screen. Then click Show Document Outline. (If you haven’t used the outline feature in a few years, you may remember it being available under the Tools menu; however, it’s now under the View menu.)
Step 2: Viewing Your Outline
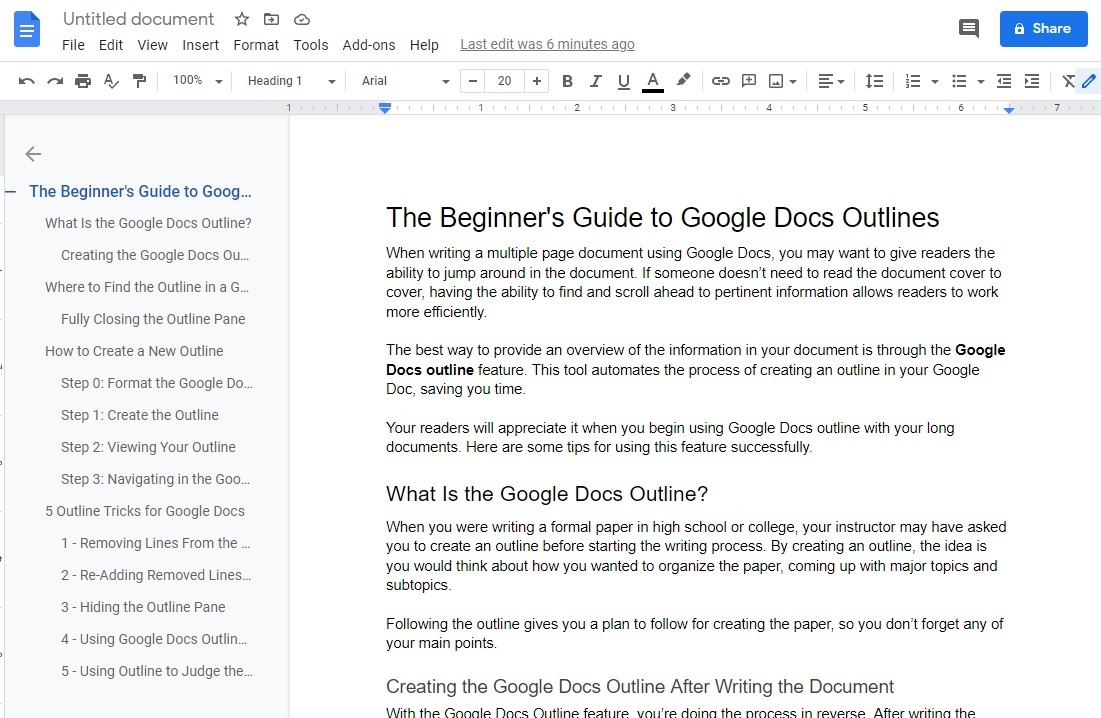
The outline will appear in a pane along the left side of the screen. It does occupy a chunk of your viewable screen, so the Google Docs app will push the main section of your document to the right.
You can continue working on the main portion of the document while the outline is visible on the left side of the screen. As you make changes to the document’s headings in the right section of the screen, the app will automatically update the outline on the left.
When looking at the outline pane, you’ll notice that the Heading 1 listings will be on the far left. Heading 2 and Heading 3 lines will be slightly indented from the left, creating a look that’s similar to a traditional outline.

Step 3: Navigating in the Google Doc Using the Outline
For the reader, using the outline to jump to the associated section of the document is extremely easy. Just click on the heading in the outline, and the app will scroll ahead to the proper section of the main document in the right pane of the Google Docs window.
This is a great way to allow someone to focus on the points in the document that are most relevant to them, rather than reading the document from start to finish.
Understand that this means the outline feature is more useful when the reader is viewing the document on the screen, rather than viewing a printed version of the document.
Step 4: Fully Closing the Outline Pane
If you want to return the main document screen to the full window view, you can exit the left side pane with the outline in it. Just click on the View menu again, followed by Show Document Outline, removing the checkmark.
5 Outline Tricks for Google Docs
Using the outline feature in your Google Doc has quite a few advantages, as long as you understand how it can help you. Here are some ways to make the most of Google Docs outline.
1 – Removing Lines From the Outline
If your outline extends over more than one screen, you may want to think about editing and deleting some of the entries in the outline. An outline that is too long and cluttered may not be all that helpful for readers.
You may have needed to use quite a few Heading 2, Heading 3, and Heading 4 listings in your document to keep your information organized, but you may not want to see all of those headings appear in the outline. You’d prefer to cut down the outline to make it easier for the reader to scan the information.
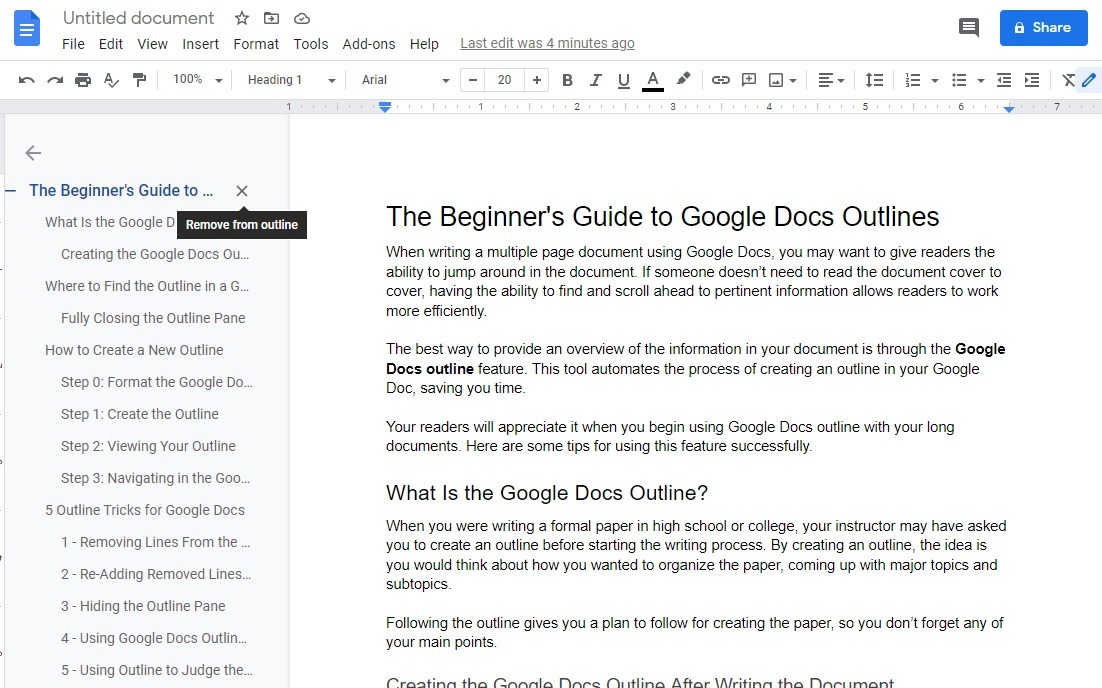
You can remove individual lines from the outline at any time you want. Just move your cursor over the heading in the outline pane that you want to remove. You should see an X appear to the far right of the line. Click on the X to remove the line.
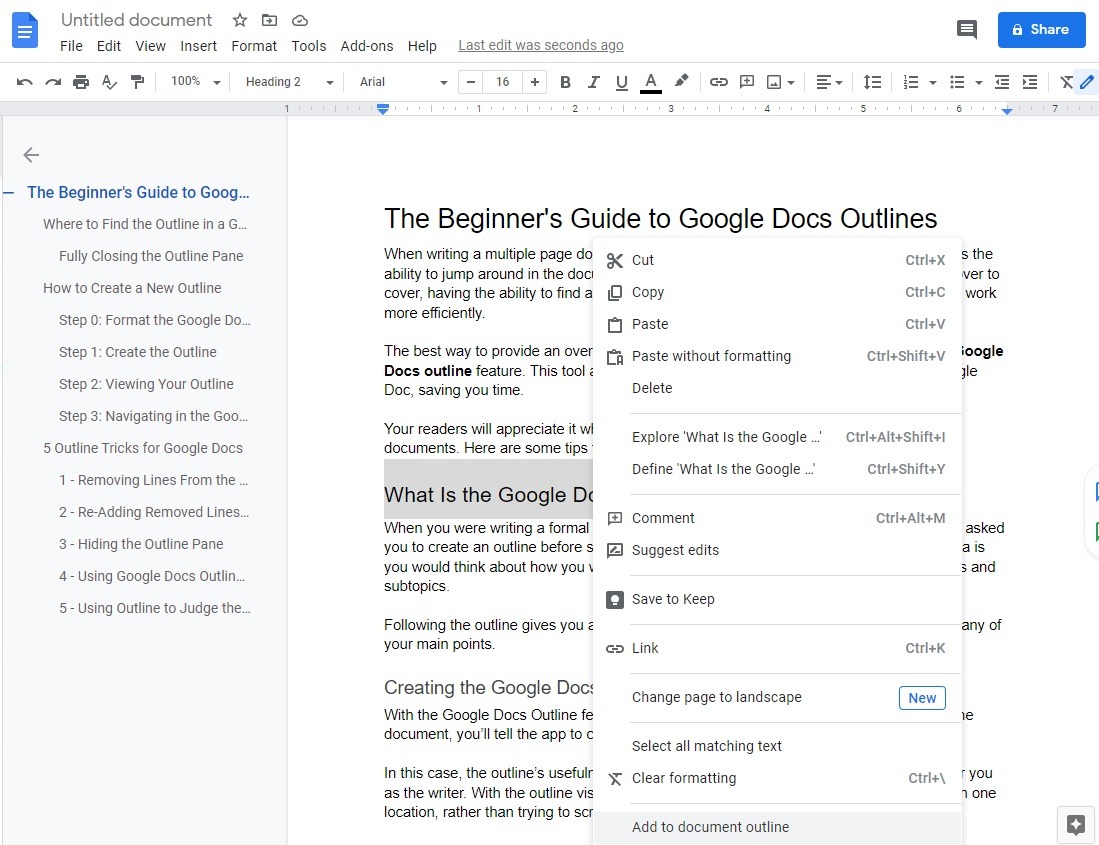
2 – Re-Adding Removed Lines Back to the Outline
Should you want to return a line to the outline that you deleted earlier, this is an easy process.
Scroll through the main document until you find the heading that you want to add back into the outline. Highlight the heading. Right-click on the highlighted heading. In the popup menu, left-click on Add to Document Outline. The heading will go back into the outline at the proper location.
3 – Hiding the Outline Pane
There may be times when you want to hide the outline pane while keeping the outline feature available to use without completely closing it (as we described earlier).
Click the left-facing arrow in the upper left corner of the outline pane to temporarily close the outline pane. This pushes the pane farther to the left and allows the main document pane on the right to expand to occupy more space.
To reopen the outline pane, click on the document icon on the far left of where the outline pane would be.
4 – Using Google Docs Outline on the Mobile App
To use the outline feature in either the Android or iOS mobile app, open your document on the screen.
Tap the More icon (represented by three vertical dots on Android and three horizontal dots on iOS) near the top of the screen. In the popup menu, tap Document Outline. This will open the document outline in a pane on the bottom of the screen. The Google Docs mobile app uses the same process of pulling headings out of the document to create the outline that it uses on the browser version of Google Docs.
To navigate through the document using the outline feature in the mobile app, just tap on any of the headings in the outline. To close the outline feature, tap on the X in the outline pane.
5 – Using Outline to Judge the Organization of Your Document
Finally, one of our favorite reasons to use the Google Docs outline feature is to test the organization of the document.
By using the outline feature, the app pulls all of your headings out of the document and lists them in the outline. This allows you to see the headings in a clean design, rather than with the distractions of the document’s body text. When using the outline view, it’s easier to determine whether you may need to add some extra headings at a few different places in the document.
You also can be certain that your headings are descriptive enough. When you want to allow readers to click on the headings in the outline to jump to relevant locations in your document, the headings need to be descriptive. Single-word headings probably aren’t going to tell your readers much about the information that’s available.
Along those same lines, you may find that the headings are too wordy. Good headings should give readers information they can digest quickly, while perfectly describing the section that will follow in the document. By using the outline feature, you’ll be able to focus solely on your headings, making them as useful as they can be, which will help the overall organization of your document.

