How to Find Your Archived Emails in Gmail
Archives aren’t just reserved for museums and libraries. You can archive emails in your Gmail account.
But, the odd thing is, when you archive an email in Gmail it doesn’t go into a special “Archive” folder as you would expect.
The email does disappear from your main inbox feed, however. So, where does it go? The Twilight Zone?
Well, your archived emails are actually still there. You just have to rummage around to find them.
Here are two ways to locate your archived emails:
Method 1: Use the All Mail Label
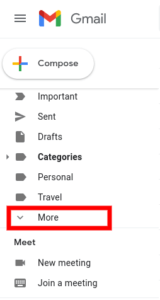
Step 1. Go to the menu on the left and click More.
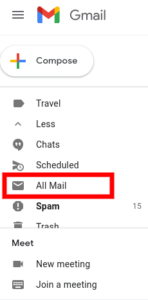
Step 2. Select the All Mail label.
You’ll now see a list of all your emails, including archived emails. If you archived something a while ago, it may be difficult to spot in this long list. You could end up scrolling for an eternity. Thus, you may find the next method more useful…
Method 2: Use the Search Bar
Type some identifying information into the search bar above your email feed, e.g. sender information or subject:
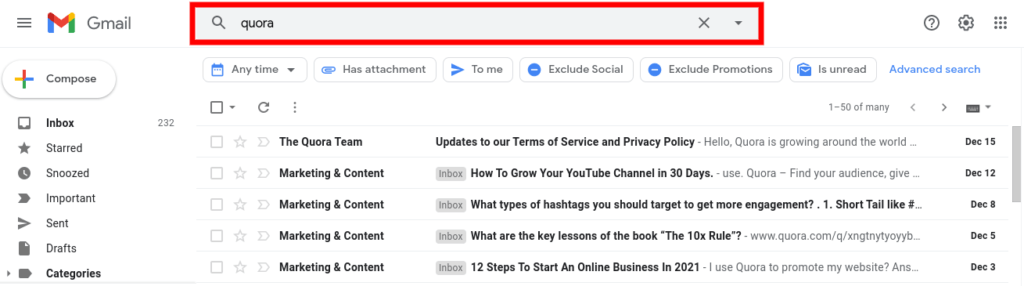
The more specific your search, the easier it’ll be to find that elusive archived email.
How to Turn Off the Email Archive
When you swipe an email in the Gmail app on your phone, you expect the app to delete it. But, frustratingly, it doesn’t delete the email; it automatically archives it.
Here’s how to get Gmail to delete emails instead of archiving them:
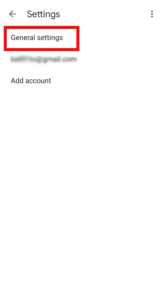
Step 1. Go to Settings.
Step 2. Select General Settings.
Step 3. Tap Swipe Actions.
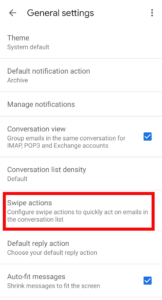
Step 4. Tap Change.

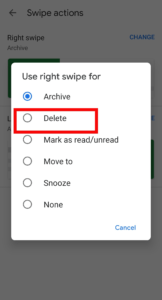
Step 5. Tap Delete (or another alternative to archive if you desire).
How to Retrieve Archived Emails in Gmail
Once you’ve found your archived email, you might want to unarchive it. Or, in other words, put it back in your inbox.
Here’s how to do it:
Step 1. Find the archived email via All Mail or Search.
Step 2. Select the email by checking the box next to it.
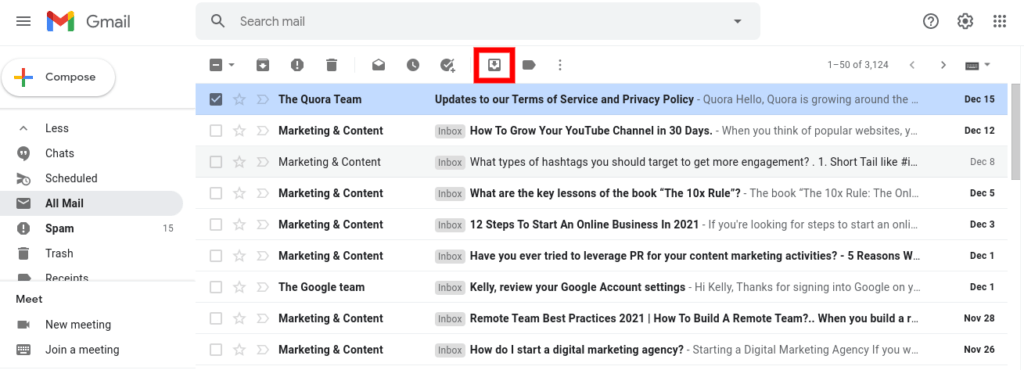
Step 3. Click the Move to Inbox icon.
How Archive Is Different Than Deleting an Email
You’re no doubt familiar with the little trash can icon you use to delete emails.
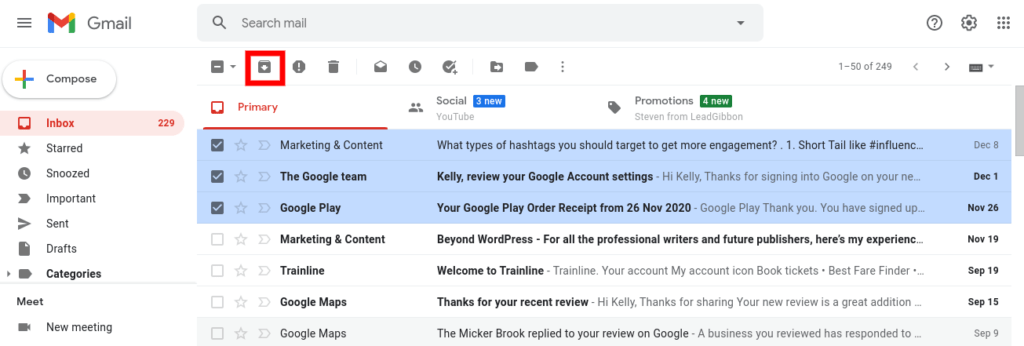
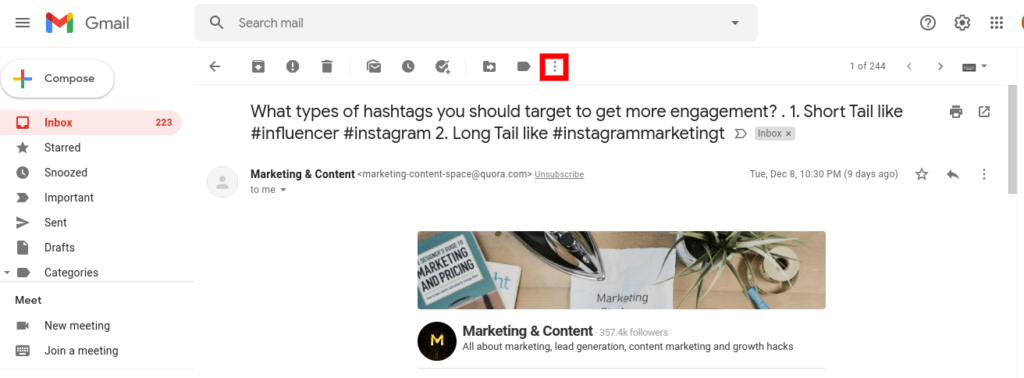
To archive an email, hover over it and select the archive icon that appears on the right. Or select multiple emails and click the archive icon in the bar above:
Archiving an email saves it in your Gmail account indefinitely.
When you delete an email in Gmail, it goes into your trash for 30 days. After that time period is up, the email is automatically erased forever.
You can, of course, completely erase emails during the 30-day period by emptying your trash folder.
Gmail Archive vs. Delete
Should you archive or delete an email in Gmail? Here we have one of life’s big questions…
In some cases, it might be beneficial to archive rather than delete emails.
Say, you’re organizing your inbox. It’s a task you need to do from time to time. Some of us have over 200 unopened emails in our inboxes (oops).
Anyway, while you’re sorting through your emails, you may come across some that contain business correspondence or perhaps receipts from online purchases.
Those are the types of emails that you may need to look at or reference again in future. Thus, it would be better to archive such emails rather than get rid of them for good.
In other words, you can maintain a clean inbox without having to delete emails.
So, what’s the other side of the coin? When is it better to delete emails?
Aside from the obvious, i.e. you’re not interested in the email or it’s junk, there are a couple reasons why you might want to delete an email.
Firstly, for the sake of security. It’s a good idea to delete emails that contain sensitive information when you don’t need them any longer. You don’t want any malicious parties seeing your private stuff.
Another reason is to free up space. Free Google Drive accounts come with a fair amount of storage – 15 GB. But, this is shared across Docs, Sheets, Gmail and anything else you decide to store in the cloud. Hence, it’s possible you’ll need to free up some storage space by deleting old emails.
Tips for Using the Gmail Archive
Want to become a Gmail master? Here are our top tips for all things related to the Gmail archive:
1. Automate Archiving
Give yourself a break and automatically archive emails until you’re ready to read them. To do this, apply a filter to the types of emails you want to archive.
For instance, if you’re on vacation from work you could archive all work emails until you’re back in office.
Here’s what you need to do:
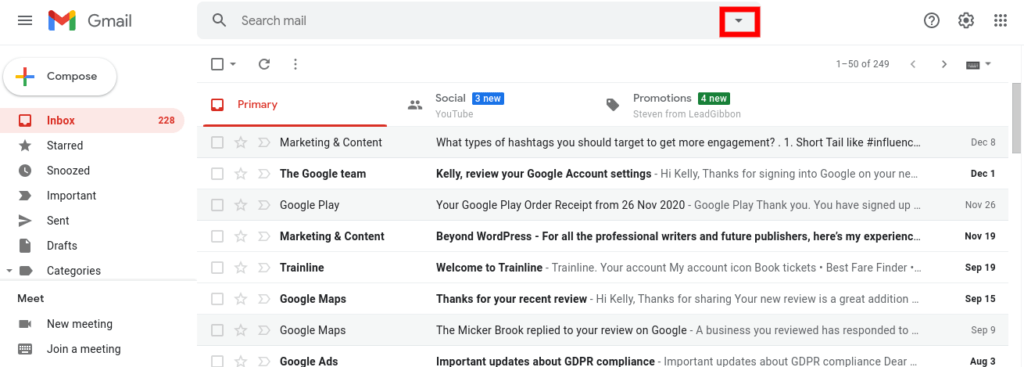
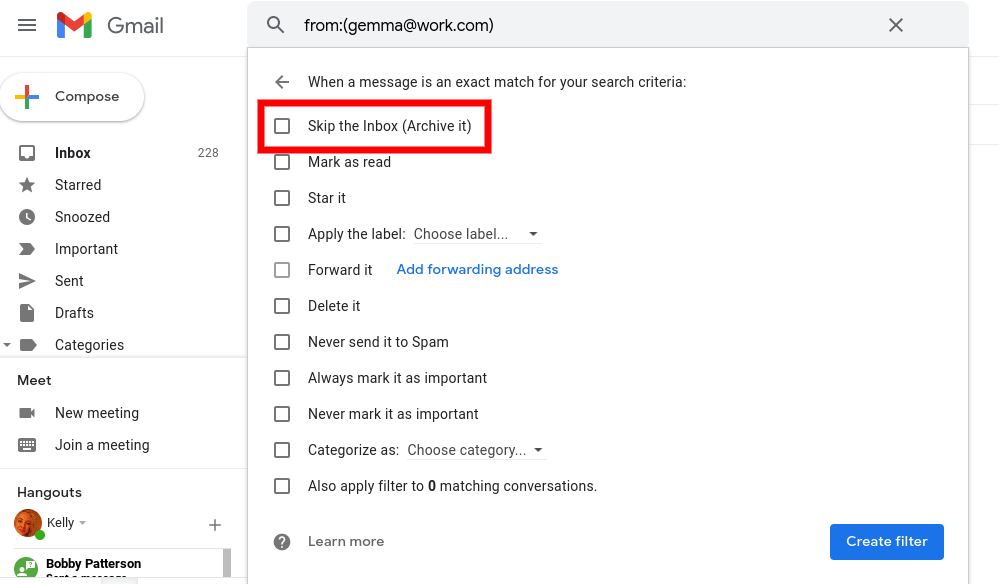
Step 1. Click the downward arrow in the search bar.
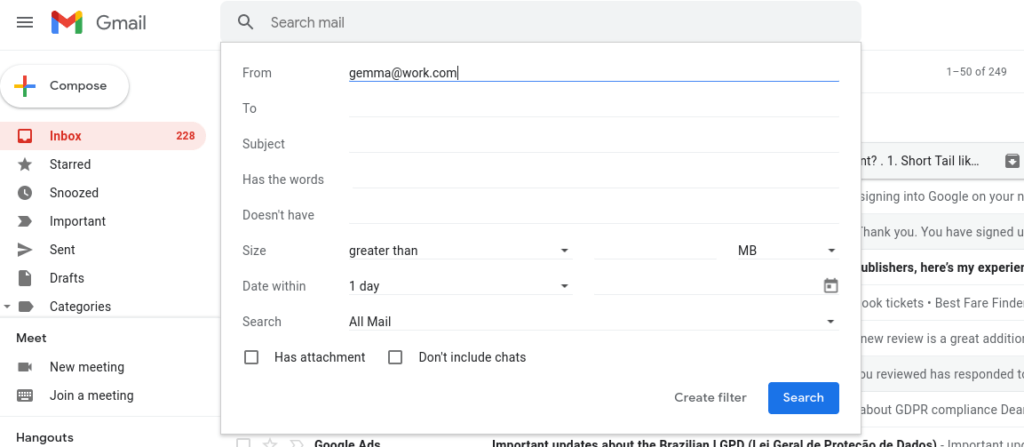
Step 2. Enter information for the emails you want to archive, e.g. from a particular email address or Has the words “invitation etc.
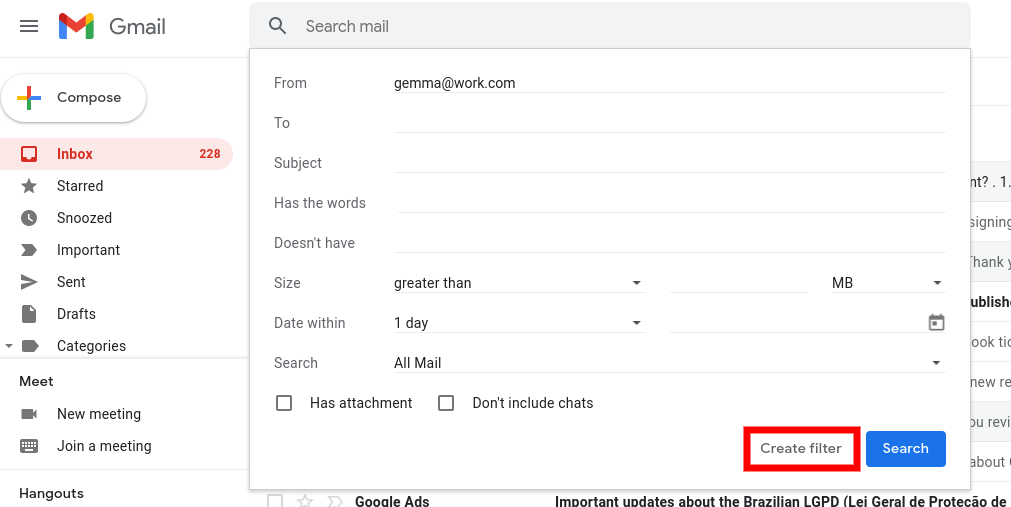
Step 3. Click Create filter.
Step 4. Check the box next to Skip the Inbox (Archive it) and then click Create filter.
It’s also worth noting that there are a ton of options for you to label and filter incoming emails here. Use them to organize your inbox like a pro.
2. Mute Email Threads
If you’re part of a WhatsApp group, you’ll know that the incessant pings can get super annoying. Even if you love your BFFs, sometimes you just need to mute a conversation for the sake of your sanity.
What’s cool is that you can do something similar on Gmail. You can mute an email thread by sending new messages to archive automatically, leaving your inbox as clear as a summer’s day.
Step 1. Open the email conversation.
Step 2. Click More in the bar above (the three vertical dots).
Step 3. Select Mute.
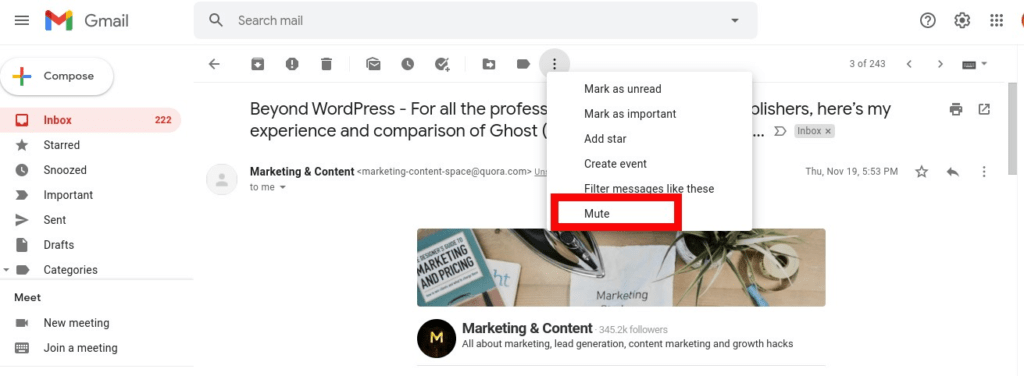
Any new messages within that thread will be archived, i.e. available to view at a later date in All Mail.
3. Archive Sent Messages
Perhaps you want to keep your Sent folder as tidy as your inbox. Well, you have the option to archive any messages you want to as you send them.
But, first, you need to adjust your settings so that this option is available:
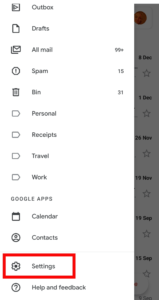
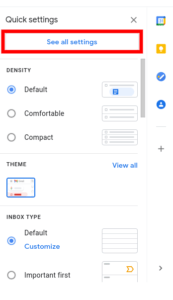
Step 1. Go to Settings.
Step 2. Click See all settings.
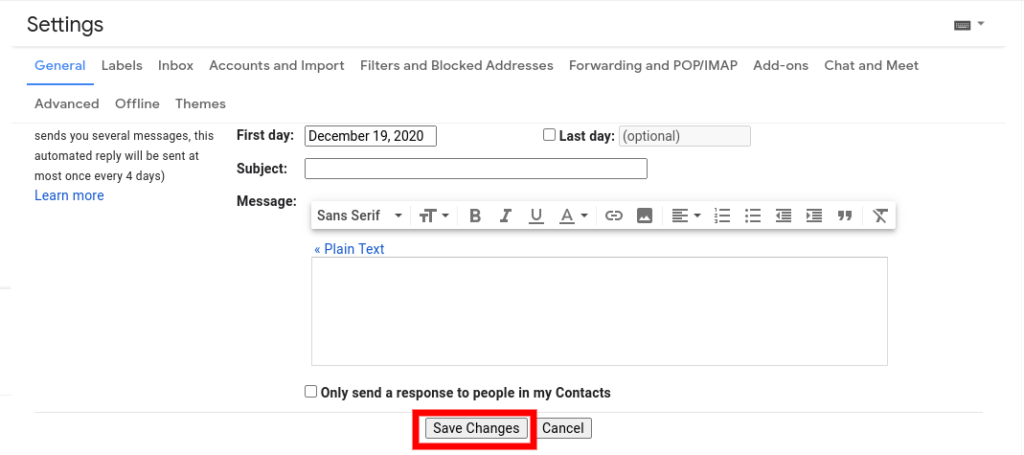
Step 3. In General, scroll down to Send and Archive and check Show “Send & Archive” button in reply.

Step 4. Scroll to the bottom and click Save Changes.
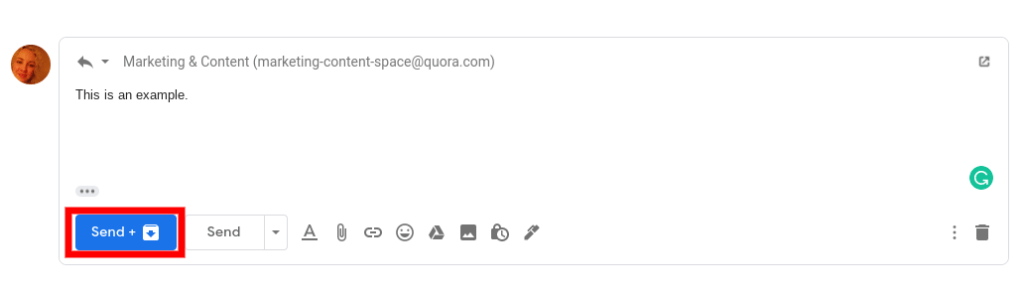
Step 5. Now you can click the Send + [Archive icon] whenever you send a reply.
4. Label Archived Messages
As you’ve seen, it’s not super easy to find archived emails in the All Mail folder. So, you’re better off searching for archived emails.
It will be easier to find particular archived emails in search if you label them. Say, for example, you can’t remember who the email was from.
Here’s how to create a new label:
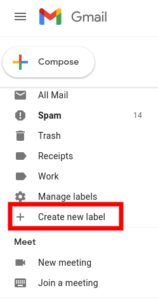
Step 1. Go to the menu on the left and select More.
Step 2. Click Create new label.
Step 3. Give your label a name then click Create.
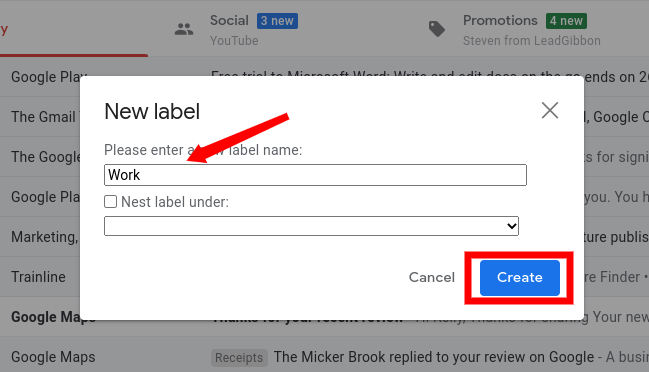
You might choose a label, such as “Work” or “Shopping” to sort your emails into separate categories.
To add a label to an email in your inbox:
Step 1. Open the email in question and click the label symbol in the menu bar.

Step 2. Check the appropriate label and click Apply.
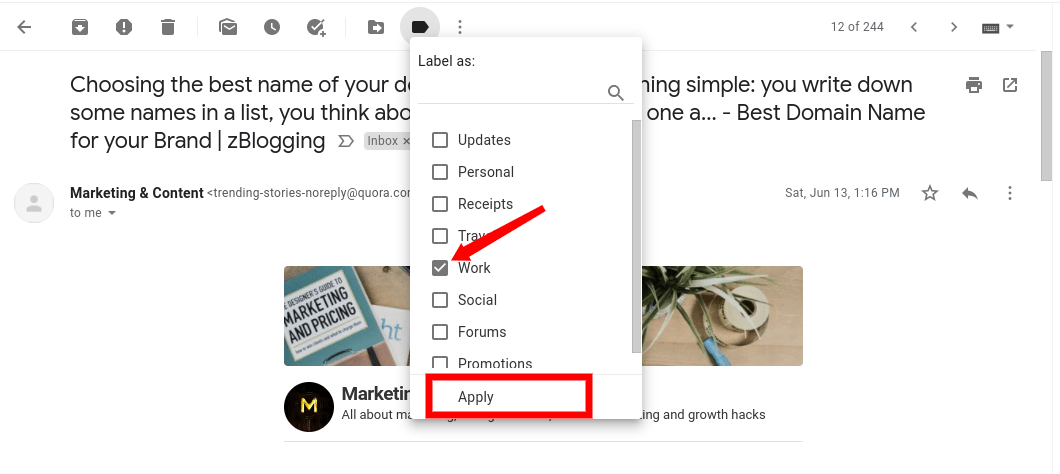
Note that Gmail already has a bunch of labels set up that you can use.
Now, when you search for an archived message, you can simply enter the label into the search bar to narrow down your search significantly. Plus, new folders for each of your labels will be available in the sidebar.
5. Use Keyboard Shortcuts to Archive Emails
Keyboard shortcuts can save you a bunch of time and energy. Gmail has a ton of handy shortcuts that you can use.
In order to use them, you first need to switch keyboard shortcuts on:
Step 1. Go to Settings.
Step 2. In General, scroll and find Keyboard shortcuts then check Keyboard shortcuts on.

Now all you have to do is hit the “e” key when you have an email open to archive it at hyperspeed. Pretty cool, huh?
Here are a couple more useful shortcuts that relate to archiving:
Archive and go to previous conversation – }
Archive and go to next conversation – {
6. Archive Emails from Multiple Accounts
I don’t know about you but I have multiple personal email accounts and a work email account. Some people have multiple business or work email accounts, too. For instance, you may have an info@ plus a yourname@ email address for your company.
The great thing about Gmail is it allows you to check, archive and complete other actions to these emails all in one place. Though, your alternate email providers must support secure connections and have POP access for you to be able to link these accounts to your Gmail.
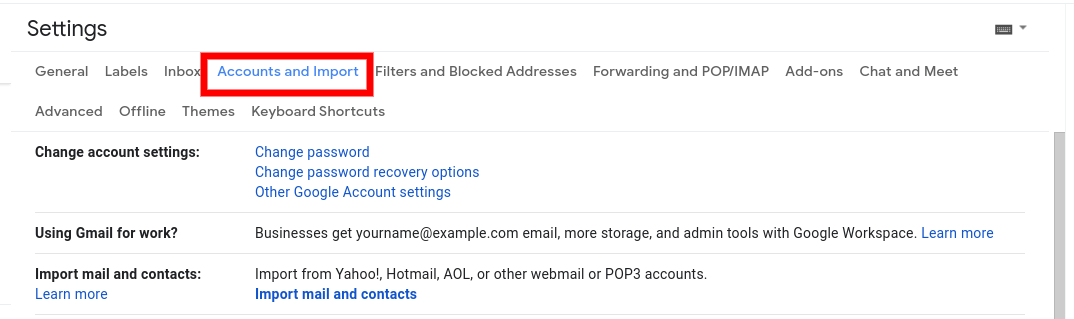
So, the first thing you need to do is enable POP access in the other account. Then add these accounts to Gmail:
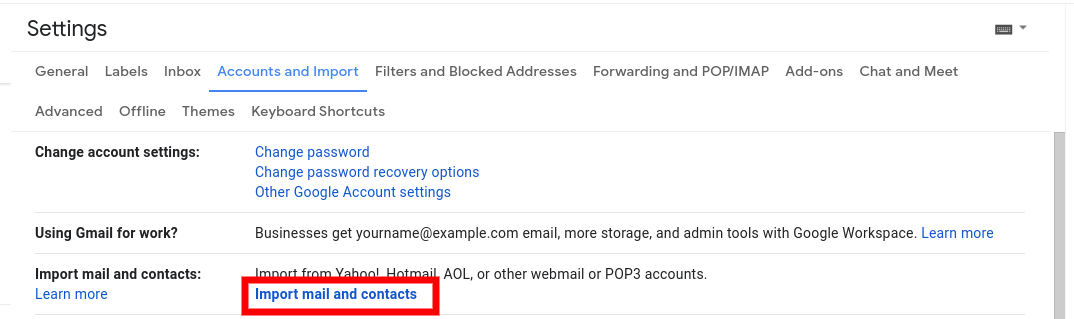
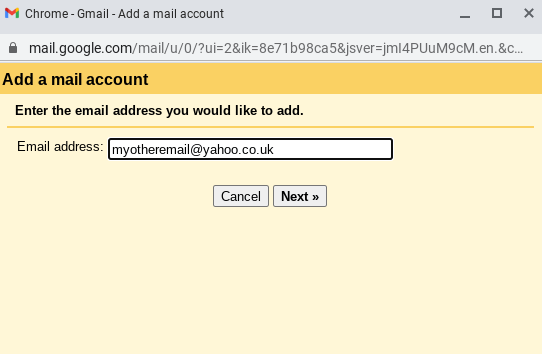
Step 1. Go to Settings and click the Accounts and import tab.
Step 2. Find the section that says “Check mail from other accounts” and click Add a mail account.
Step 3. Type in the email address for your alternate account and click Next.
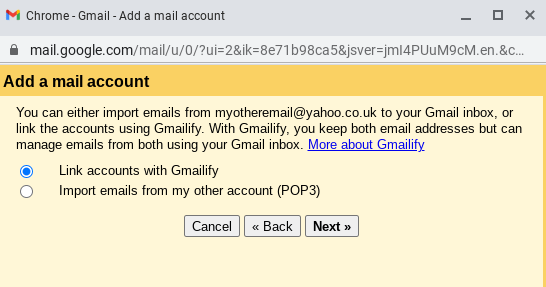
Step 4. Here you can choose to either link accounts using Gmailify or import emails from your other account.
Step 5. Sign in to your other account.
Step 6. It’s recommended that you check the following boxes: “Always use a secure connection (SSL) when retrieving mail” and “Label incoming messages”.
Step 7. Click Add Account.
Now emails from the other account will appear in your Gmail account. And you can archive them as you would a Gmail email.
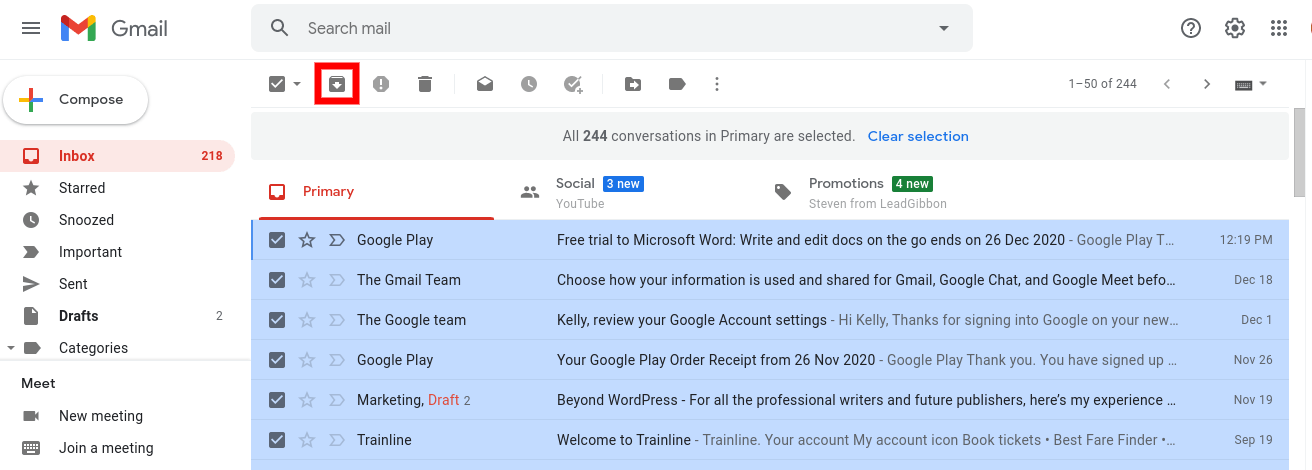
7. Archive Your Entire Inbox
Emails can pile up after a while. Maybe you want a fresh start. But that doesn’t mean you have to delete all of your emails. Clear your inbox by archiving every single message:
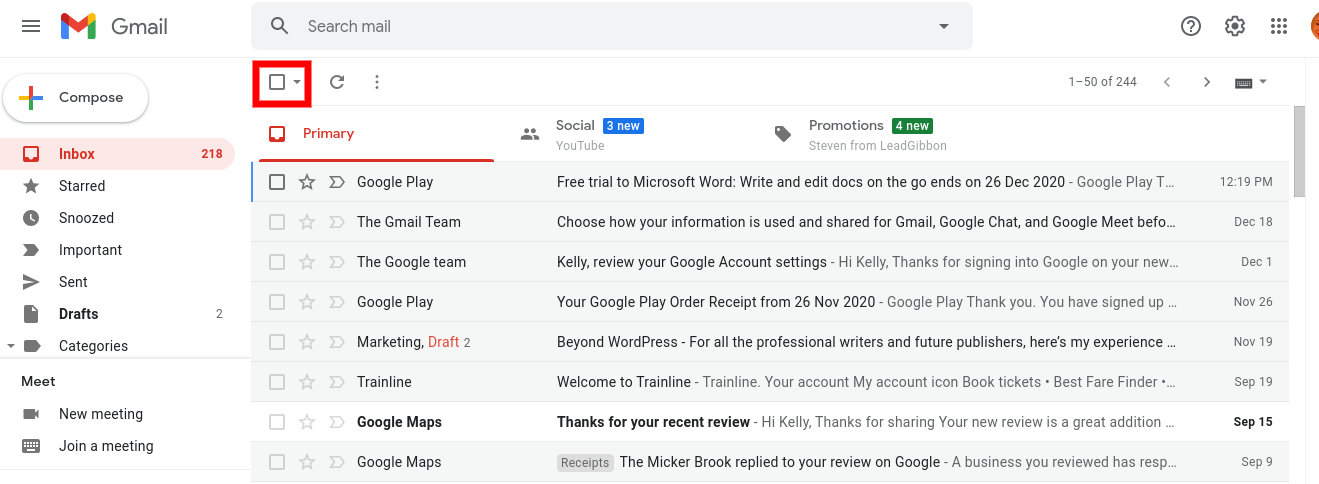
Step 1. Check the box in the menu bar to select all emails on that page.
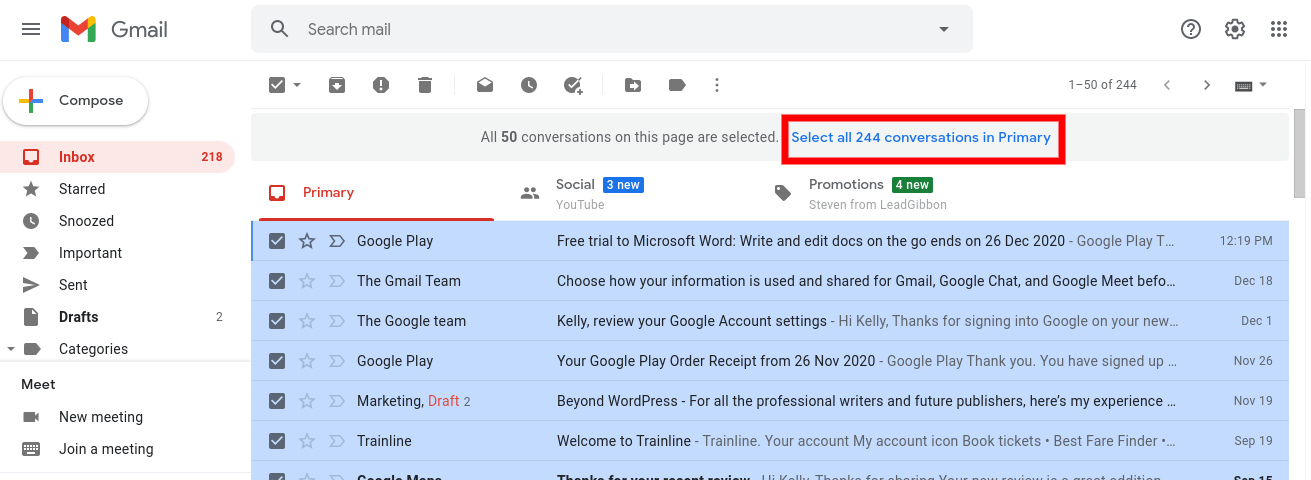
Step 2. You’ll now see a bar above your emails. Click the link that says Select all conversations in Primary.
Step 3. Click the archive icon in the menu bar to archive all messages in your inbox.
8. Keep Your Inbox Tidy
If you’re super busy and find email stressful, then we have some rules of thumb to help you out.
Firstly, set aside some time once a day to check and organize your emails. In other words, don’t keep flitting back and forth between your inbox and whatever you’re working on all day.
Checking your emails just once and giving yourself a time limit to do so is a much more efficient and less stressful way to do things.
When you’re going through your emails, if something requires a response or action that’ll take less than a minute just do it and get it over with.
If it will take longer you can archive it under a specific label. Or, maybe even create a “To do” label for the emails you want to come back to when you have more time.
If an email doesn’t require an action or response, archive it. It’ll save you the hassle of having to go through your inbox and find what you need to archive at a later time.
Summing Up
At first, you might think that Gmail does things in a bit of a strange way. You question why on earth Gmail doesn’t just have an archive folder.
But, really, Gmail’s features do allow you to keep your inbox super organized. The fact that you can essentially sort your archive into separate categories using labels is particularly useful.
Even without labels, you should be able to find archived emails relatively quickly and easily, as long as you remember some information about the email that you can put in the search bar.
And on that note, we’ll bid you adieu and hope you enjoy your nice and neat, new inbox.

