The Ultimate Manual to Airtable Automations
The launch of the Airtable Automations feature has taken Airtable users’ productivity to another level. While it is still in its early stages, the feature lets users automate from directly inside their databases without having to use third-party software.
With Airtable Automations, you can create an automation to add a set of tasks each time you create a new project, which will save you time and effort from undertaking monotonous manual data entry.
What Are Airtable Automations?
Airtable Automations allow you to centralize, accelerate, and take control of your workflow. You can further customize and create your own Airtable Actions, such as:
- Send emails using Airtable
- Sync Airtable to Google Calendar
- Update records based on changes in other applications
- Send messages in Slack/Microsoft Teams
- Schedule tweets and other social media posts
- Register payments using Stripe
- Manage files with Dropbox/Box
- Create a post-action for Facebook Pages
- And many more!
Custom-trigger action processes can be configured right inside your Airtable Base using Automations. You can automate repetitive activities, which, in turn, boost communication efficiency and lower the total margin of error, saving you and your team a lot of time.
What’s more, you can stay on top of incoming requests between the notifications. Configuring Airtable Automations will send you notifications on your workspaces, such as Slack and Trello, to help you stay updated and take necessary actions to stay on top of things.
Advantages of Airtable Automations
This particular Airtable feature comes with several offered advantages. Some of these are:
- Airtable Automations can adapt to your changing demands. Even if the amount of data increases over time, they’ll remain stable to ensure consistent performance.
- Airtable Automations can optimize your workflows and courses easily. For instance, if you find during the construction of automation a specific process is inefficient, you can recreate and optimize new workflows and processes.
- With Airtable Automations, you can avoid doing unpopular or monotonous legwork. For instance, you don’t have to copy and paste things as this feature can do it for you.
5 Airtable Automation Examples and How They Work
One of the best things about Airtable is you don’t need prior coding knowledge. The same facility applies to Airtable Automations as all automation is rule-based—all you need to do is create triggers and actions to kick off operations.
Here are five examples of Airtable Automations to give you an idea of what else you can automate.
Example 1: Document Automation
You can connect Airtable with a document automation solution to automatically create documents by querying the data stored inside it. Additionally, you can use them to generate documents automatically from Airtable form submissions, as well as upload the generated documents automatically to new records in the application. However, most of these solutions require a Zapier integration for this to work.
Example 2: Manage Requests
One thing that customers desire is prompt and efficient service. However, due to various reasons, you may not be able to attend to all of them at once—and deliver high-quality service.
Luckily, Airtable makes this possible.
You can automate request management so all requests receive automated responses. Moreover, the request gets directed to the concerned department to be attended to, relieving you from doing admin tasks. You can also automate emails sent to clients to review the overall work done.
Example 3: Set Notifications
Everyone will be informed in real-time if you set up Airtable notifications, regardless of whether it’s personal notifications or notifications for colleagues and clients. All these alerts will then be sent directly to email or apps your workplace uses (example: Slack).
But before that, you’ll have to set it up to respond to triggers within your workflow. For instance, if a form is filled requesting for a service, an alert can be triggered and sent to Slack—or any other application—for the team to respond on time.
Example 4: Scheduling
Most companies use Airtable to keep track of tasks that have to be performed to meet a deadline or fulfill a specific objective.
To streamline your efforts and ensure all work is actually carried out, you can set up Airtable to link with your calendar which will automatically enter tasks into your schedule. After this, everyone in your organization will just have to check their respective calendars to know what needs to be done for the day or week.
Example 5: Approvals
This is hands-down our favorite Airtable Automations.
You can set up a process flow within Airtable that sends out automatic approvals, which can understandably save a lot of unnecessary to and forth between members and facilitate smoother conversations. Every time a specific task is marked ready for approval, it’ll trigger a response email that approves the tasks, as well as informs the next person in line regarding the same.
However, you have to set up other automated processes that guarantee the task meets approval standards. Full disclosure: this will take slightly more time, but it’s worth the extra effort in the long term.
What’s more, the software can also serve as a flexible rule train, allowing you to create a trigger-based sequence of actions without having to involve developers or purchase expensive tools.
How to Get Started With Airtable Automations
In this section, we will cover how to create an automation in Airtable. Let’s take a look.
Step 1: Locate the Automation Menu
To create an automation, click on Automation is on the upper right-hand corner of your screen.
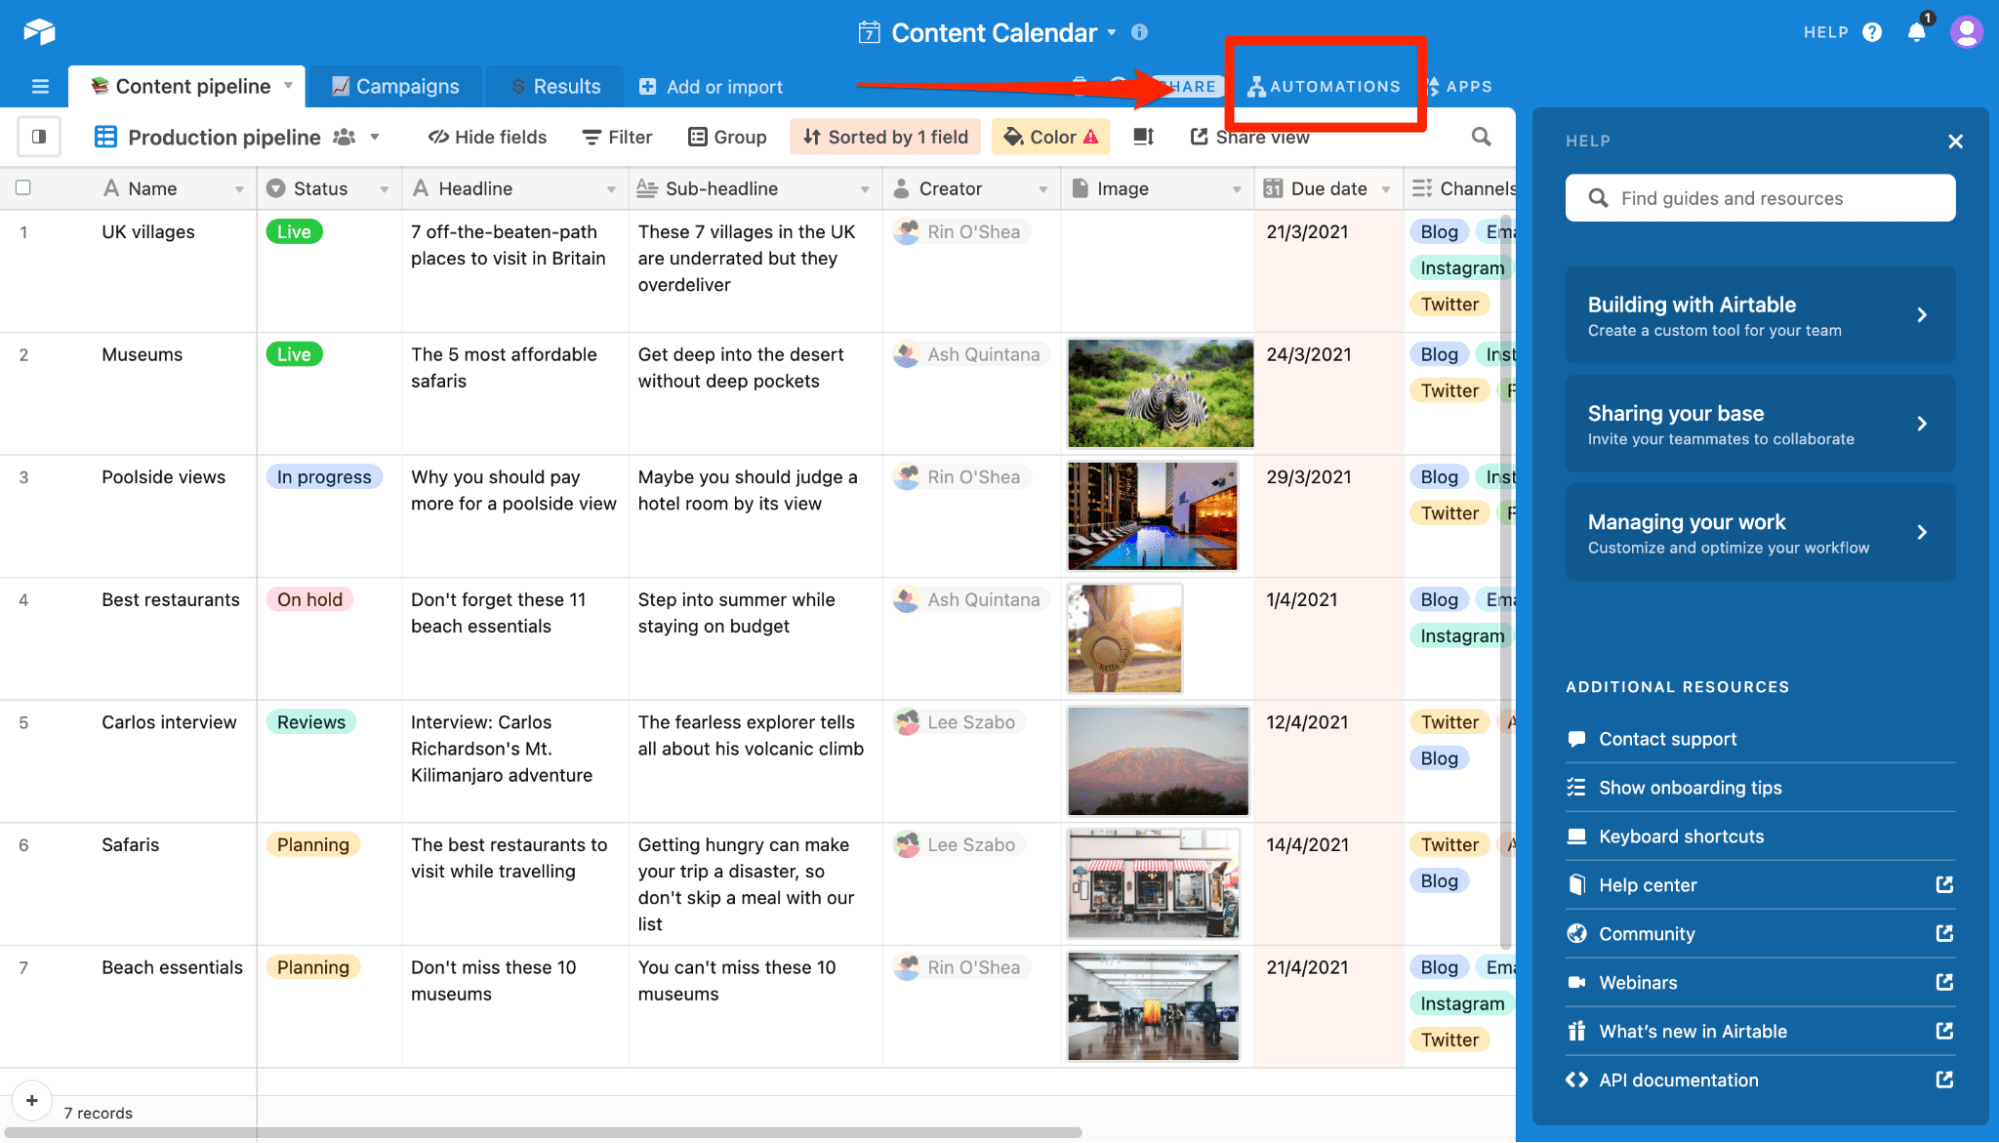
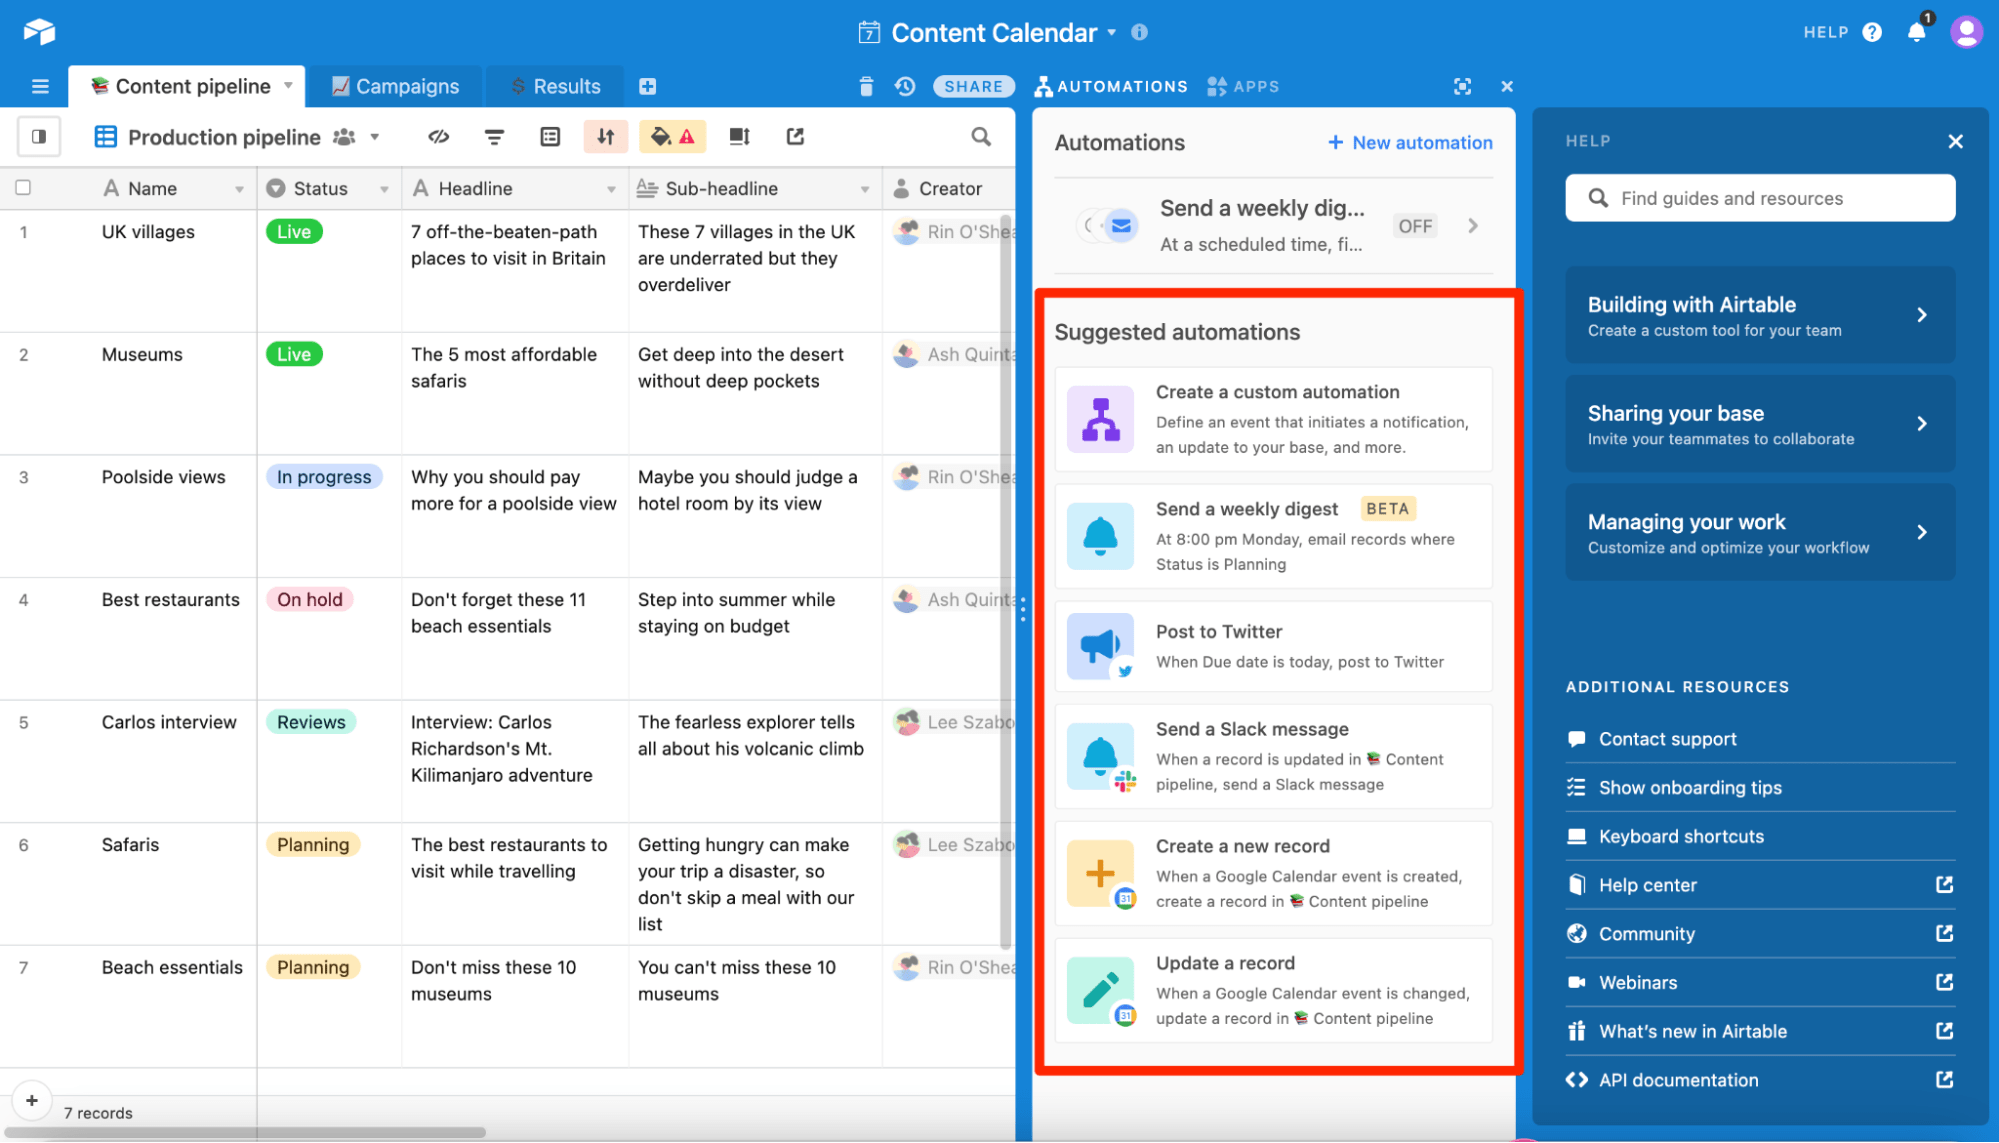
You will then see a curated list of options that includes pre-built, create custom automation, suggested automation, and so on.
Step 2: Use an Automation Template
Airtable has already created tons of amazing automation templates for users. This creates a simplified, guided process for installing and applying common automation, which comes in handy for users who have no prior language knowledge.
You can select from any of the platform’s available templates to get started and can still customize each trigger and action within the template. Amazing, right?
Step 3: Create a Custom Automation
While you can always use pre-built templates, for the purpose of this guide, we’ll show you how to create a custom automation in Airtable.
Select Create a Custom Automation. Review the automation based on what you want the automation for so it’s easier for you to understand what it will do.
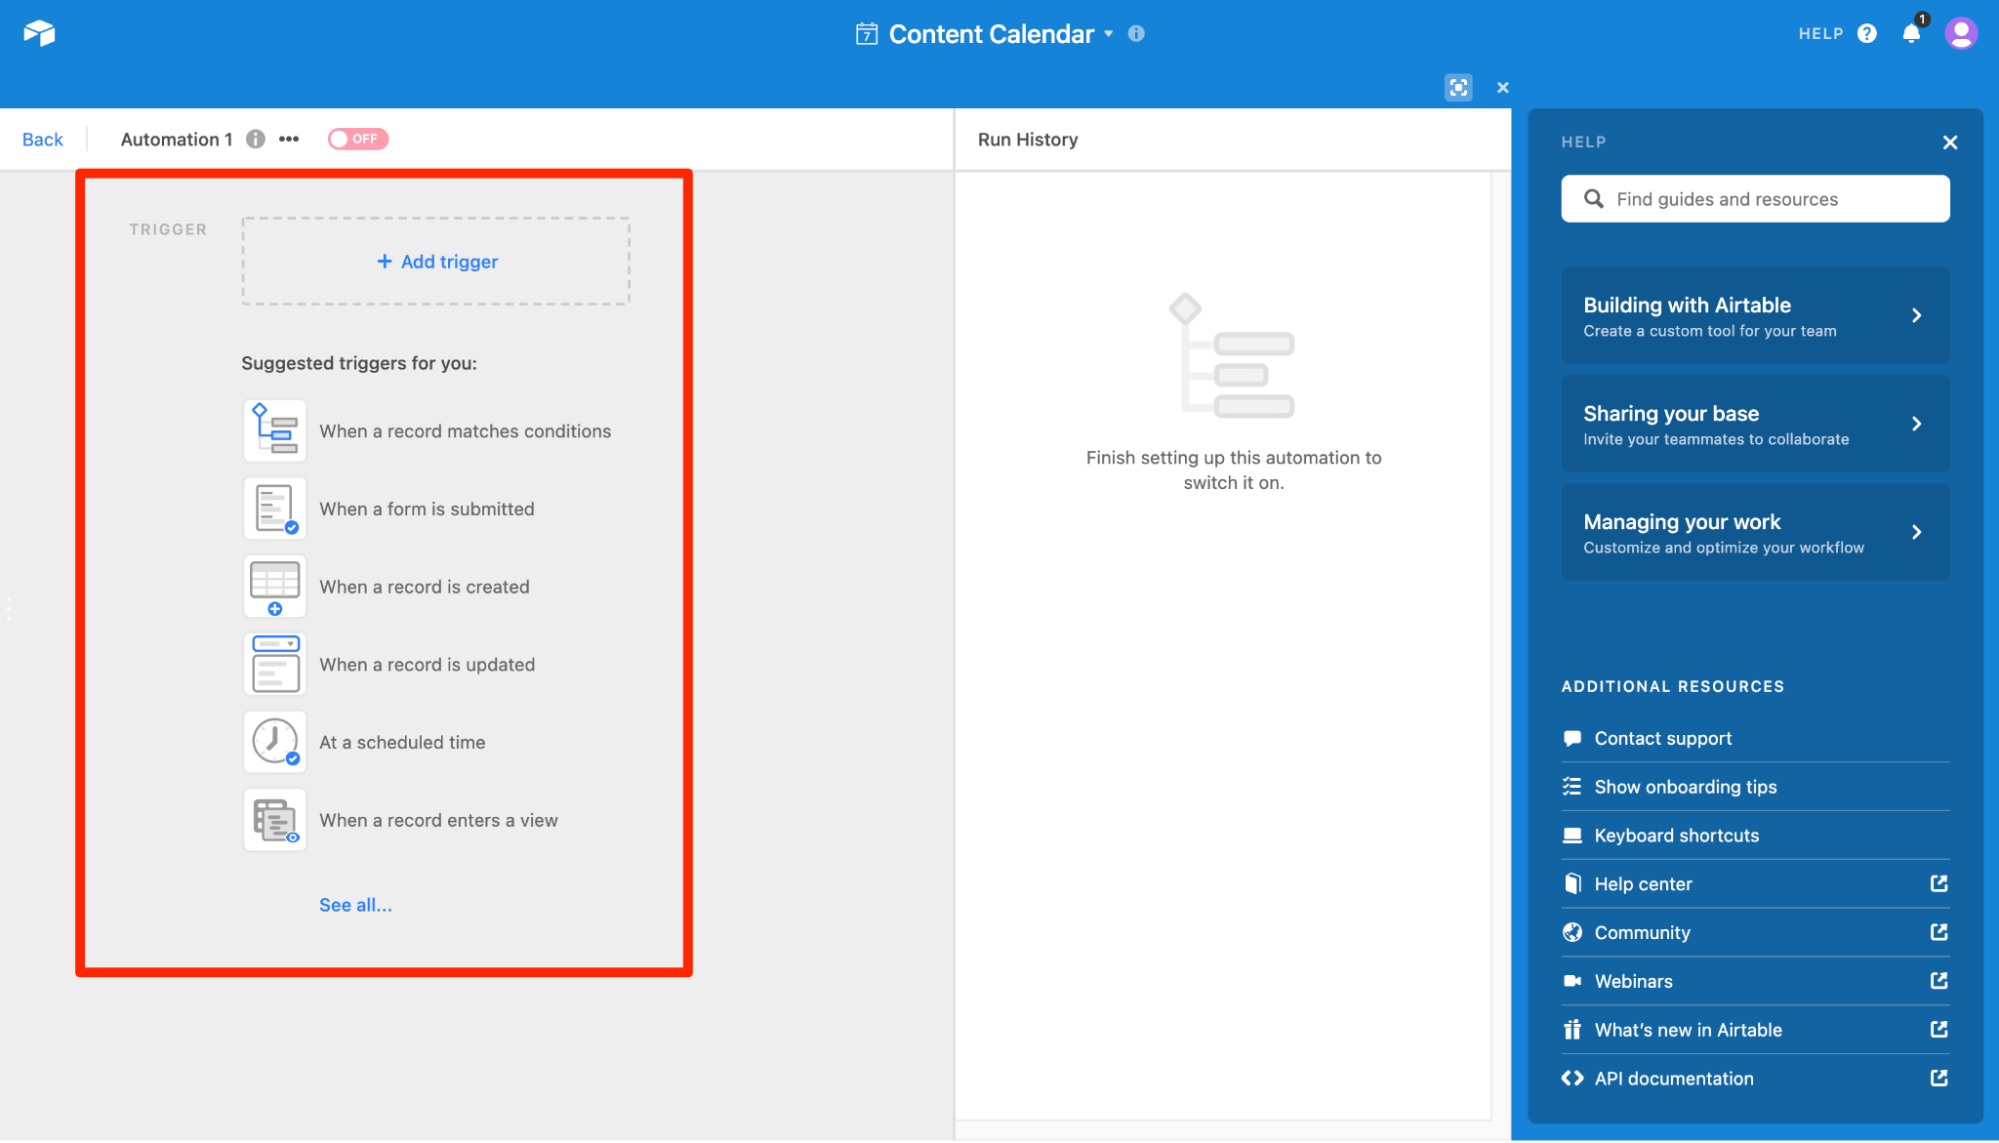
Step 4: Choose the Trigger
Every automation you create will start with a trigger that will prompt subsequent action. That’s why the next step is to choose the trigger to set forth the automation.
Click Choose a trigger. You’ll now see a list of suggested triggers. You can also create a brand-new trigger if you have something specific in mind.
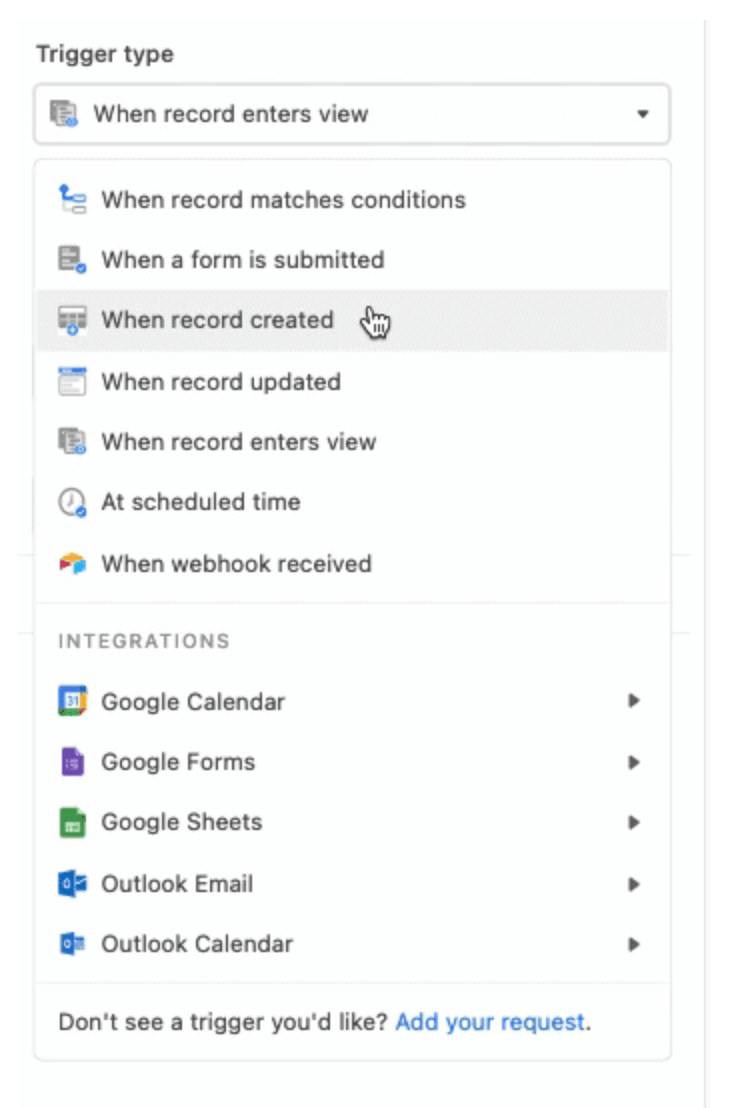
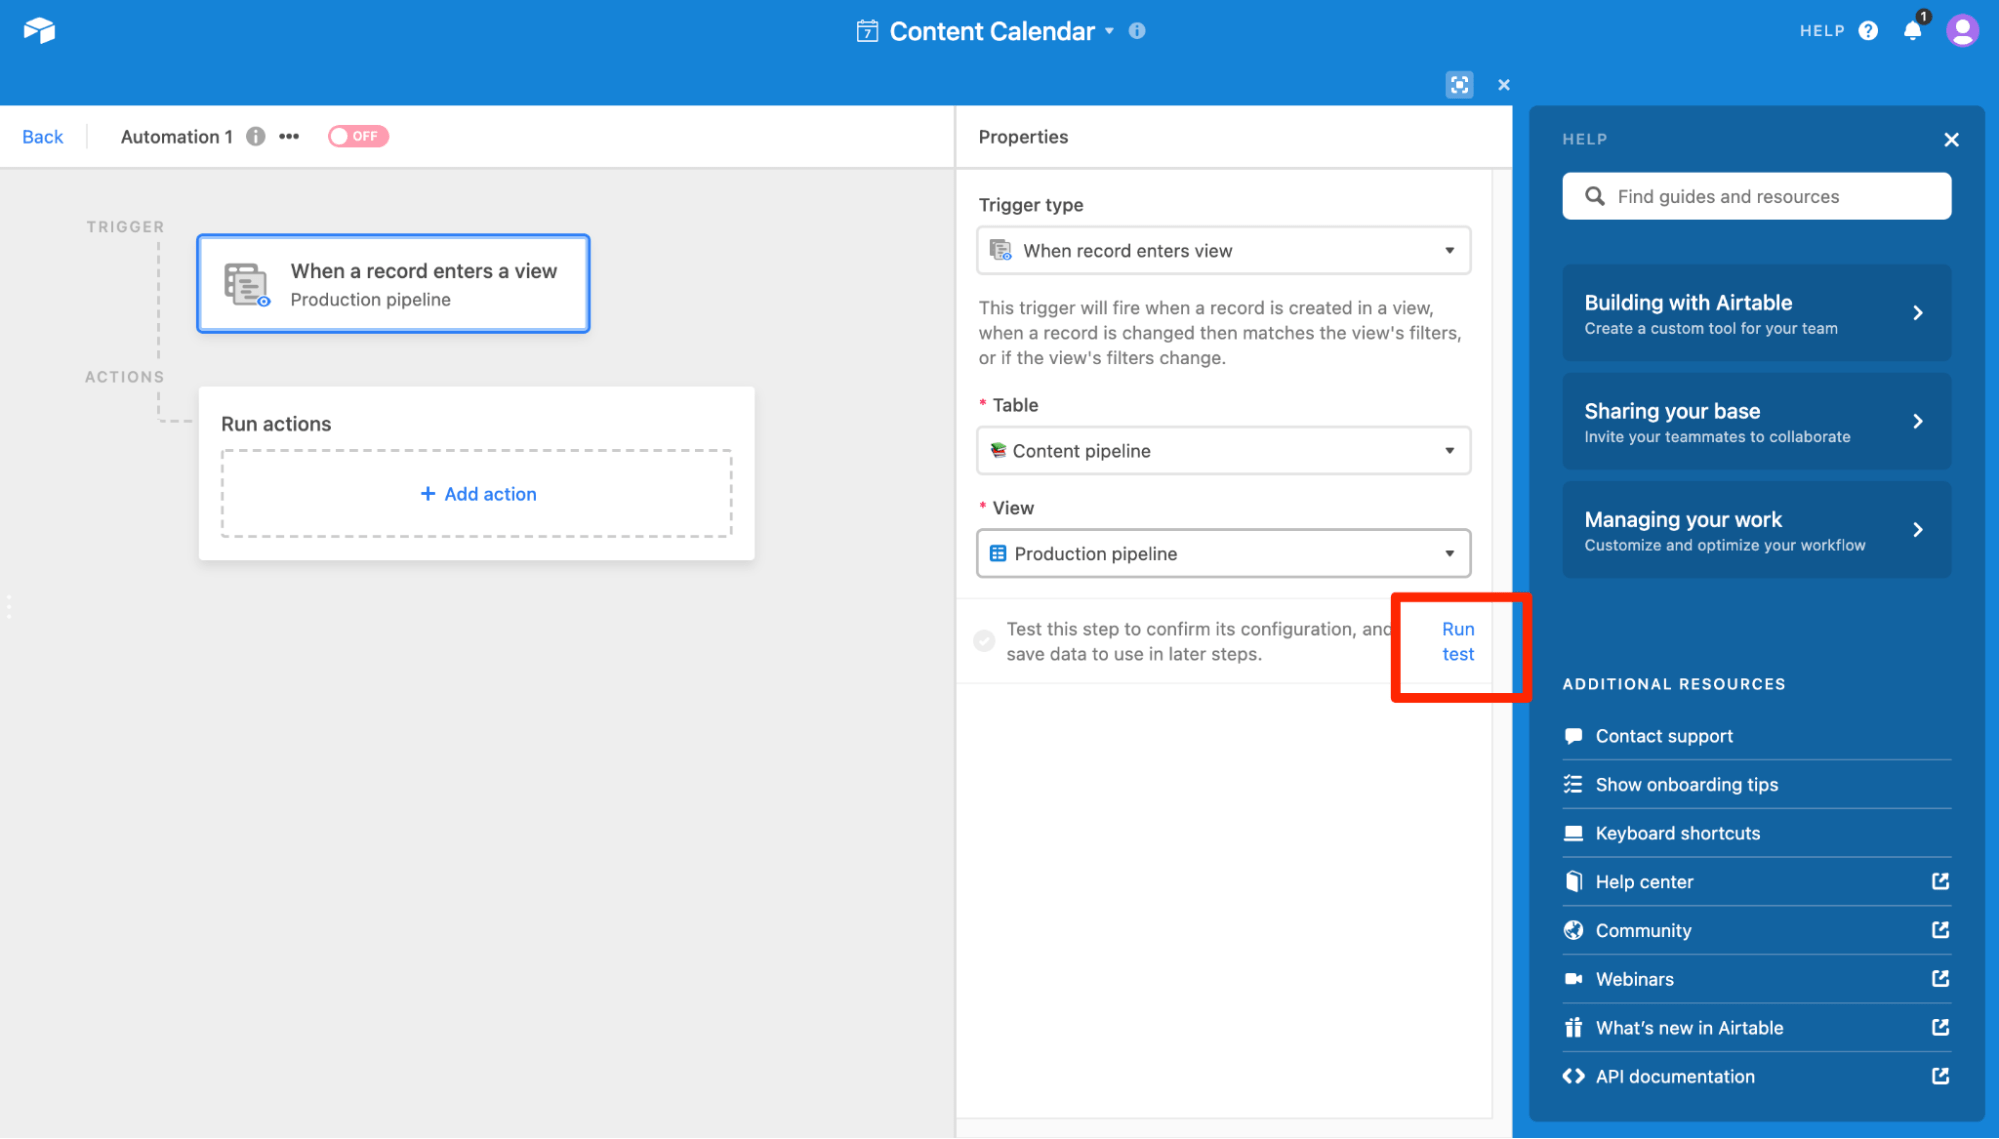
After that, select your preferred table for this automation. If you opt for the When a record enters a view trigger, you’ll have to choose a specific view as well. This view should be the one you created specifically for this automation.
In case you put the wrong trigger accidentally, or if you would like to try another trigger type for your automation, you can always change your trigger type by choosing another option from the Trigger Type dropdown.
Step 5: Test the Trigger
Next, you’ll have to test the trigger.
Select Run test. You will then see a test record, along with its values. This testing is necessary, so make sure you don’t skip this step.
Once the test is complete, the results will be displayed. This will also include the values for the test record that triggered the automation. If you run into an issue during the testing process, you can refer to this Airtable guide that covers automation troubleshooting.
If you want to view the values of the record, expand this Field Values section.
Step 6: Add an Action
After you have successfully tested the trigger, select Add action.
You’ll now see a list of available actions to choose from. For the purpose of this article, we’ll select Send an email.
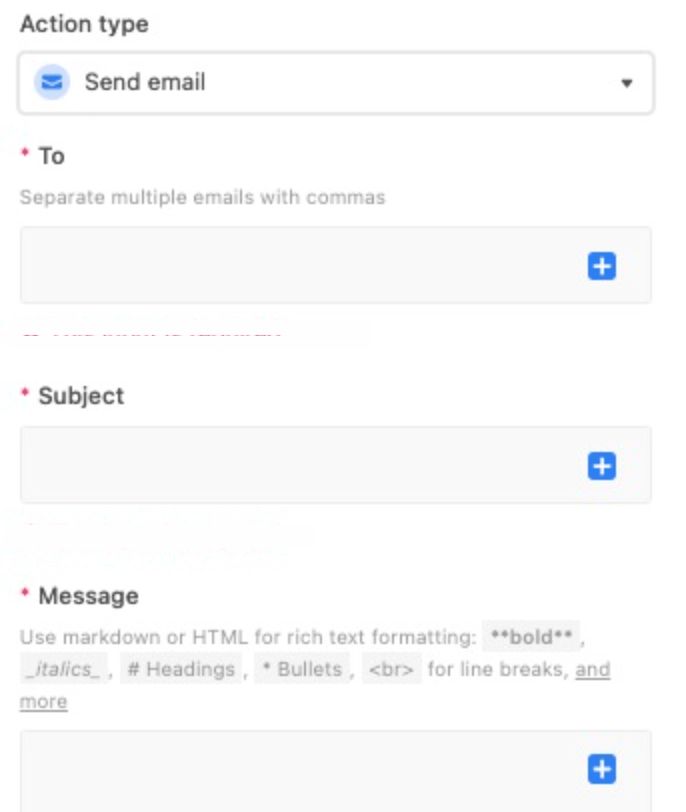
Add recipients, subject line, and message body for the email. Then click on the blue and white plus sign to add values in the triggering record. You can access more values by clicking on the Field values dropdown arrow.
Click on the Show more options dropdown arrow to customize four additional parts of the automatic email to send out—CC, BCC, From name, and Reply to.
Step 7: Test the Action
The last step is to test the action to make sure it’s successful.
Test each step of the automation process to make sure your automation is working as expected.
You can also find more information about a specific action’s test. The process for this is similar to the trigger test we discussed earlier. You can click on the dropdown menu next to the test result to view the values being pulled from any records attached to your automation.

